
Every website owner wants to speed-up the loading times of their website. Even the search engines like Google, Bing, and Yahoo love the website load time when contemplating for indexing and page ranking which means web search ranking also depends upon website speed. As well as, all internet users, like fast loading website and spend more time surfing. In addition website owners can reduce operating costs, increasing and improving the performance of the website, means increasing income while driving down operating costs.
Therefore, in this guide, I’ll show you how to speed up your WordPress site by sharing my web performance strategies and recommendations, step-by-step.
I include everything from why speed is important, what slows down your WordPress site to actionable steps that you can take to boost your WordPress speed immediately.
Why WordPress Site Speed Matters?
Today more than ever website speed matters not only for ranking higher in SERPs but also to provide an improved user experience and realize higher conversion rates. Google had announced back in 2010 that desktop website speed had an impact on your SERP rank. However, recently Google has also announced that mobile website speed has an effect on how you’ll rank.
According to the survey, 40% of the people navigate off from the website which takes more than 3 seconds to load. When a person gets on your website’s page, it’s the speed that helps in capturing the attention of your visitors and persuades them to explore it further. But rather if your page responds slowly, you can end up losing your visitors, which is a great loss for your business.
According to a StrangeLoop case research that involved Google, Amazon, and other large websites, a 1 second delay in page load time can lead to 7% reduction in conversions, 11% less in page views, and 16% decrease in customer satisfaction.
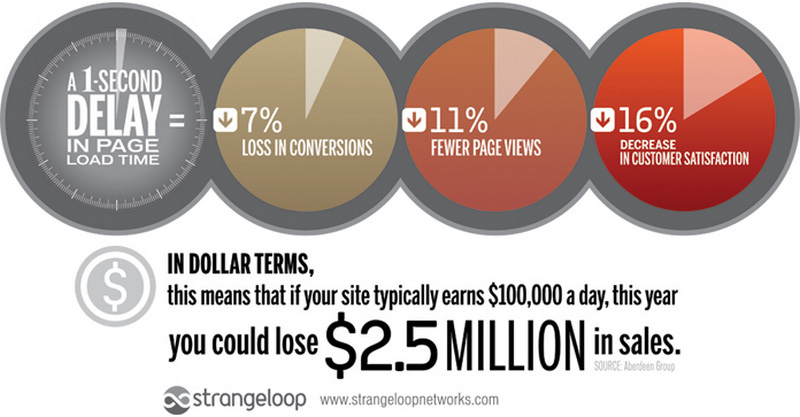
That just proves how important website speed actually is. Therefore if you’re ready to get started on optimizing your WordPress site for better performance, read on.
Affiliate Disclosure: This article contains affiliate links, which means Affapress earns a small commission whenever you end up purchasing products we recommend. However, the opinions written are only based on our experience and not how much they pay. Please continue to support our work and learn more about our affiliate links policy.
WordPress Performance Basics
Right now, you should understand the reason why having a speedy website is important, and possess some idea of what can go wrong. What’s more, you’re aware of how well your website is currently performing. This will be a great start. At this stage, it’s time to get the first steps towards optimizing your WordPress site and improving its speed.
What Slows Down Your WordPress Site?
You need to now be fully conscious of the negative outcomes long load times can have on your website. However, it’s equally essential that you know very well what causes a website to slow down in the first place.
The major causes for a sluggish WordPress site are:
- Web Hosting – When your web hosting server is not configured properly it can damage your website speed.
- WordPress Configuration – If your WordPress site is just not providing cached pages, then it will certainly overload your server hence leading to your website to become sluggish or crash entirely.
- Page Size – Especially images that aren’t optimized for your website.
- Bad Plugins – If you’re employing a poorly coded plugin, then it can substantially slow down your website.
- External Scripts – External scripts such as ads, font loaders, etc can also possess a huge effect on your website performance.
Now let’s have a look at several following WordPress site speed testing tools.
Check Your WordPress Site Speed
There are numerous sources that help in order to determine the speed of a website relative to other websites, so webmasters and authors can take corrective measure to make their own website faster.
However, for this particular time, I will just introduce three free tools which I have found most useful to test a website’s speed. I suggest that you repeat these tests several times, to get a more accurate result. It’s also smart to operate these tests regularly. New factors can affect your website and slow it down unexpectedly, so you’ll constantly have to keep up-to-date along with its performance.
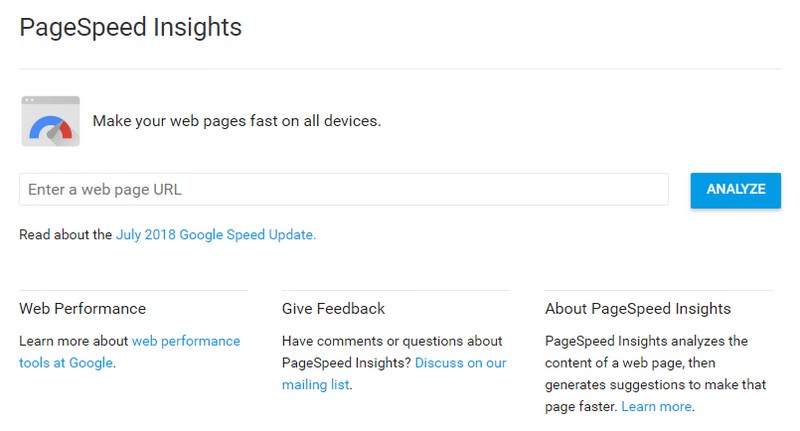
Google PageSpeed
As you can see from the title, Google PageSpeed Insights is one of Google’s product. Next to the score (split into desktop and mobile) and the useful instructions on what to do to improve your page loading time, you can also draw a bottom line on what Google loves to see on a website. Which things it wants to be enhanced on a website to rank good in the search engine results.
When you have any unoptimized images or resource files (CSS or JS), it will generate a new zip file using their optimized counterparts, which you can replace on your server later. Pretty neat, right?
You can start a test by entering your website’s page URL on the home page and click on the “Analyze” button. Since this test will scan on several aspects of your page, it can take slightly more time to complete.

This tool does not have a lot of detailed information, like other tools, but it’s a good starting point, which covers all the key aspects of page speed optimization. It lists the steps that will improve your website the most.
Pingdom Tools
The second option I’ll be looking for is Pingdom Tools. This tool accesses your website pages from a particular location and returns details about how quickly they loaded.
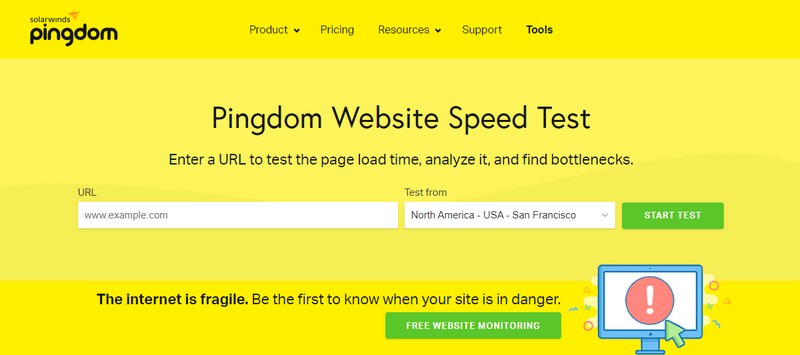
This method allows you to test your website’s loading speed. Plus, Pingdom Tools rates your website depending on several metrics. For instance, it displays how many requests were required, how many redirects were performed, and exactly how your website’s speed compares to others.
To do a test, simply enter your website’s URL into the particular field on the main page, choose the location you would like to use and click on on “Start Test”. You might be put in a queue, according to how many people are currently utilizing the tool, but in my experience, it usually takes less than a minute regarding the test to start. Once the test is complete, the page will reload, and you’ll be able to view your results.

Considering that the results will vary slightly each time, you’ll wish to achieve this several times to get an average figure. This will provide you with a more extensive overview of how well your website performs and gives some insight into exactly what areas of your website require to be improved.
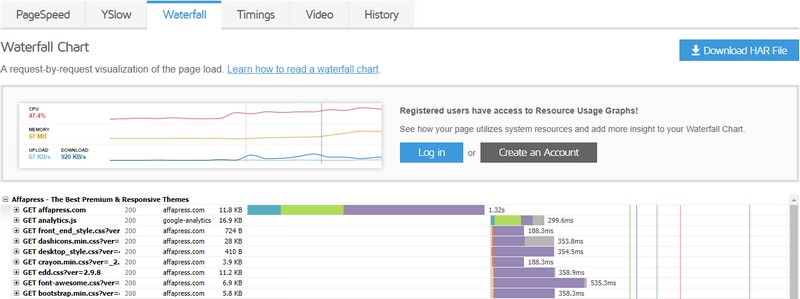
GTmetrix
Pingdom Tools is an outstanding resource, but I also suggest that you give GTmetrix a try. This is another free speed-checking tool that can be incredibly useful. It works much the same way as the previous tool, but it also provides more in-depth metrics and even offers optimization ideas depending on your results.

You can start a test by entering your website’s page URL on the home page and click on the “Analyze” button. Since this test is a little more extensive, it can take slightly more time to complete. While it’s being carried out, you can see how many websites are forward of you in the queue.
When the test has concluded, you’ll get accessibility to a lot of data. You’ll see how quickly your website loads, as well as other data, including the overall size.

Scroll down the page and you’ll find tabs with even more detailed results, such as resource usage. Nevertheless, you’ll need to register for an account in order to get accessibility to all of this information.
Remember to run this test a few times as well to obtain a reliable average result. As soon as you’ve done that, you’ll have a solid idea of how well your website is performing. You can then interpret the results to find areas where your website could be improved. Using that information, it’s finally time to see how you can make your website faster.
WordPress Speed Optimization Foundations
Exactly like building a house, you don’t want to build your WordPress site on quicksand and have problems right at the starting. You want to build it on solid foundations, so it will last for years without problems. The three main things to check are:
WordPress Hosting
Web hosting is the very basis of your WordPress site and is therefore a crucial component that ought to not be overlooked, although you may currently have a hosting. Switching to a much better hosting provider will speed up your website loading time for up to few seconds.
Selecting the right web hosting is important and you should not base your choice on the price of the hosting. Usually, with low prices, you get low performance which is what you want to avoid.
A good hosting choice will save you a lot of pain down the road and if you need to do come across a problem, a good customer support should be able to help you out, so I would also keep in mind to choose a host that offers good support. One quick trick you can utilize – ask them a pre-purchase question and monitor their reply time, attitude and professionalism.
Through the many web hosting service providers, I use and recommend SiteGround for your WordPress site hosting.

Why You Should Choose SiteGround?
Regarding their commitment to uptime, speed, security, and support – it truly is the superior web host right now! And I’m not the only one that ❤️ them.
WordPress Theme
If you are choosing a WordPress theme for your website, you always start with the design of the theme and that’s OK. You should first choose a few themes that you like because you want your website to be eye-catching and a great design is an initial thing a visitor sees. The second thing is probably the features of the theme. Does the theme or the theme recommended plugins offer the functionality that you want? If it does, great! You are in business! What you almost always forget is to check how fast the theme loads.
You can test the loading time of the theme demo page and you’ll quickly see if the theme is optimized for speed. Of course, the loading time of the demo page can likely be enhanced, so if you don’t get a perfect score, don’t worry, no WordPress theme will receive a 100% perfect score unless it has a little content on its demo page. As a rule of thumb, you should look for themes that are not in the red figures (score 50 or lower on the page speed tools).

It comes down to a good balance between theme design and features vs theme speed. As an example, an empty WordPress theme with a little of a text will load very quickly, but a swollen theme with many features (most of which might not need), with lots of multimedia content, will load more slowly. Hitting that sweet spot is the goal when selecting a good and performing WordPress theme.
So I recommend you to use a theme from StudioPress. All their themes come with mobile responsive and also have clean, lightweight code that makes your website fast, secure, and run smoothly.

Why You Should Choose StudioPress?
They’re trusted by over 210,000 WordPress users including Yoast, Matt Cutts from Google and Matt Mullenweg the founder of WordPress.
WordPress Plugins
It’s not a problem in the number of WordPress plugins you use, but in the code quality and impact, the plugin has on the system. You can have 50+ active plugins, with each of the plugins caring for a little specific functionality (with good code) and the website will run OK. However, you can have 5 active plugins and one of them could be clogging your system, making your WordPress slow.
Going over the code of each plugin may be beneficial, but ain’t no one got time for that, plus you will need good programming knowledge to do so. If you do go down that road, the things to watch out for are plugins that enqueue a lot of external resources, make lots of external HTTP requests, make unnecessary (unoptimized) database queries and so on (basically anything that slows down the WordPress site, without a proper reason for it).
What I would recommend is not to install and activate each plugin that you think you need.
First, think about it, does your website really need this added features? For example, if you have to have a button shortcode, look at your theme documentation, maybe the theme has a shortcode for it and you don’t need to install and activate an entire shortcode bundle plugin in order to use a single buttons shortcode. This is a trivial example, but I want you to think before installing and activating new plugins. Each unverified plugin could make your website heavier and therefore sluggish, plus it can result in a security breach if the plugin is poorly coded or unmaintained.
Lastly, one great thing you can take benefit of when selecting the plugin is a big WordPress global share and consequently a large community. With lack of coding knowledge, a good general guideline is adhering with the popular plugins with lots of active installations, good average rating score, and positive reviews.
back to menu ↑
Speeding Up WordPress with Plugins
In the WordPress system, I use the strength of plugins to improve website speed. The plugin is definitely an essential part. You can imagine that in WordPress, the theme is the face to show the beauty and then the plugin is the backbone which brings features and power to the website. Here is a great list of WordPress plugins that will improve your website loading times to the next level.
W3 Total Cache
WordPress pages are ‘dynamic’. What this means is they’re built on the fly whenever someone visits a post or page on your website. In order to build your pages, WordPress needs to run a process to find the necessary information, put it all together, and after that displays it to your user.
This particular process involves a lot of steps, and this can really slow down your website when you possess multiple people visiting your website at once.
That’s the main reason why I suggest every WordPress site use a caching plugin such as W3 Total Cache which makes their WordPress site anywhere from 2x to 5x faster.
This plugin does not only cache your static files as what caching does, but also contains the choice to minify your CSS and JavaScript files that come with one more step to light up your WordPress site.
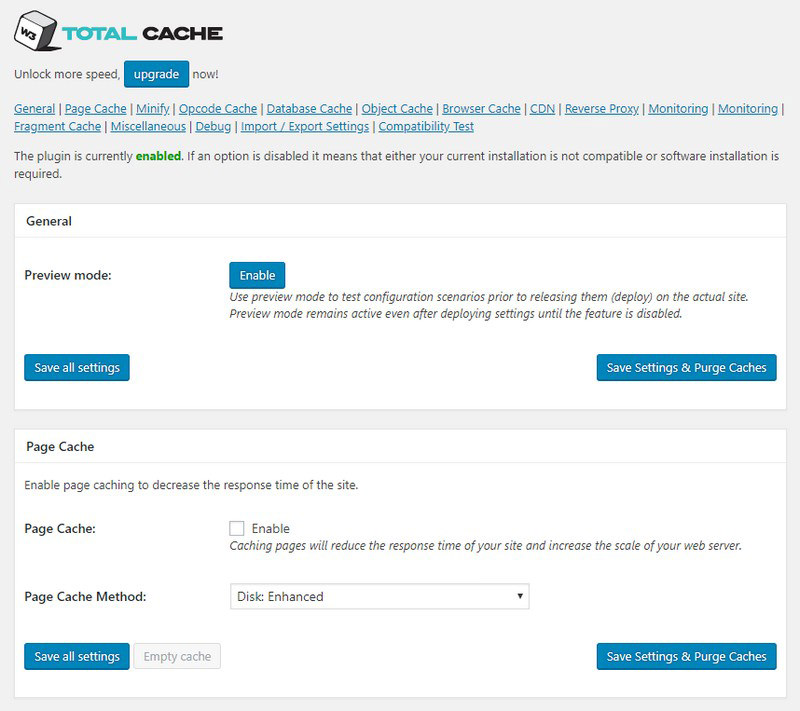
W3 Total Cache increases the user experience of your website simply by enhancing your server performance, caching every aspect of your website, reducing the download times and offering transparent content delivery network (CDN) integration.
This plugin allows you to perform the following:
- Change the order that your plugins are loaded.
- Selectively deactivate plugins by any post type or WordPress managed URL.
- Adds grouping towards the plugin admin age.
Or even you need a more robust plugin, use WP Rocket which is among the best premium plugins for caching your pages content.
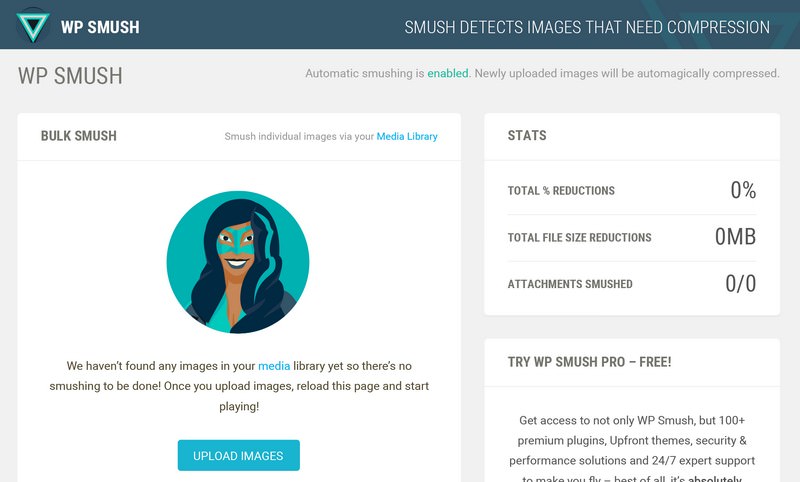
WP Smush
Images bring life to your content and help increase engagement. Researchers have found that using colored visuals makes people 80% more potential to read your content.
But if your images aren’t optimized, they could be more painful than helpful. In fact, non-optimized images are one of the most prevalent speed issues I see on beginner websites.
Consequently, I recommend every WordPress site use WP Smush plugin to optimize the size of the images used on their page content.
This plugin was created by WPMUDEV, and as they said: “Heavy image files might be slowing down your website without you even knowing it. WP Smush meticulously scans every image you upload, or have already added to your website, and cuts all the unneeded data for you.”, this plugin is helpful to improve your WordPress site speed.
Yahoo’s excellent Exceptional Performance series suggests to optimize images in several lossless ways:
- Stripping metadata from JPEGs.
- Optimizing JPEG compression.
- Converting certain GIFs to indexed PNGs.
- Stripping the unused colors from indexed images.
WP Optimize
For some people running WordPress, using phpMyAdmin appears to become a risky thing. There’s just too many options. This plugin lets you do just one basic task – optimize the particular tables of your database, in order to reduce their overhead.

WP-Optimize offers a list of features that will certainly help you clean the particular trash from your WordPress databases like unpublished posts, unapproved comments, spams, trackbacks, pingbacks and numerous other things that you might not notice.
Autoptimize
Autoptimize is one of the best speed optimization plugins that lets you minify and combine all of the CSS and JavaScript files, and load it in a right order that is the styles are relocated to the header and scripts to the footer.

This plugin even minifies the HTML code itself, making your page extremely lightweight. Also, there are advanced options available that allow you to tailor Autoptimize to your website’s specific needs.
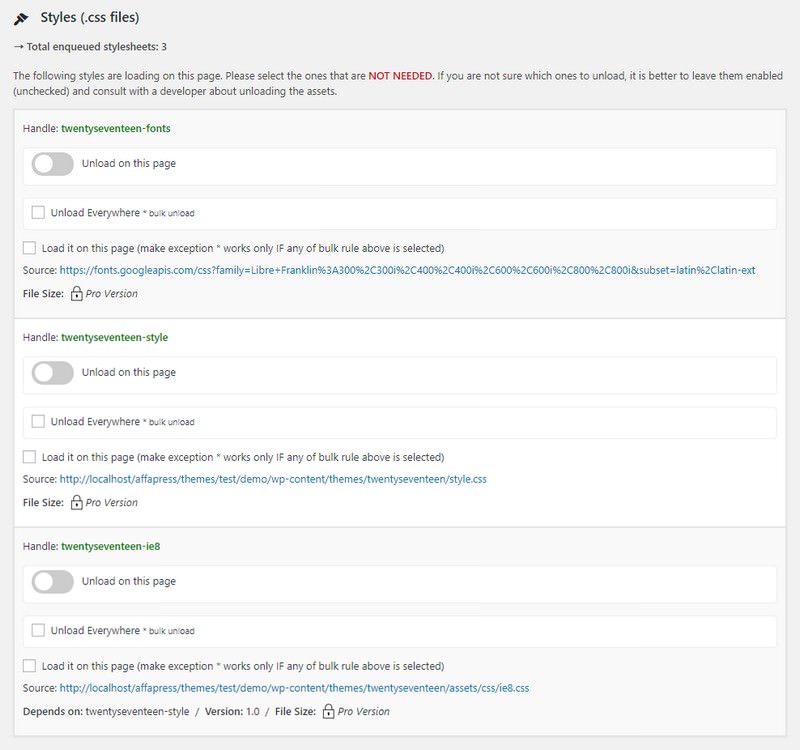
WP Asset CleanUp
In the event, you might use a plugin that generates contact forms and it loads its assets (.CSS and .JS files) on each page of your website rather than just doing it on the contact page (if that’s the only place where you need it).
WP Asset CleanUp scans your page and detects all loaded assets. All you have to do when editing a post/page is simply to choose the ones you don’t desire to load.
This plugin will provide the following benefits:
- Reduces the number of HTTP requests loaded (important for faster page load).
- Reduces the HTML code from the actual page (which is even better if GZIP compression is enabled).
- Makes source code much easier to scan in case you’re a developer and want to search for something.
- Remove possible clashes between plugins/theme (e.g two JavaScript files that are loading from different plugins and they conflict one with another).
- Better performance score if you test your URL on websites such as PageSpeed, Pingdom Tools, GTmetrix.
- Google will like your website more as it would be faster and fast page load is nowadays a factor in SERP ranking.
- Your server accessibility log files (e.g the Apache ones) will be much easier to scan and would take less space on your server.
back to menu ↑
WordPress Performance Optimization Tips
Right after installing a caching, image optimizer, database optimizer and minify plugin you’ll notice your WordPress site will start loading a lot faster.
But if you want to keep your website as quickly as possible, you’ll need to use the best practices outlined below.
These tips are not too technical, so you don’t need to know any code to implement them. But using them will prevent common issues that will slow down your website.
Keep Your WordPress Updated
Being a long-lived and well-maintained open source project, WordPress is often updated. Each update will not only provide new features but also fix many security issues and bugs. Your WordPress theme and plugins might have regular updates as well.
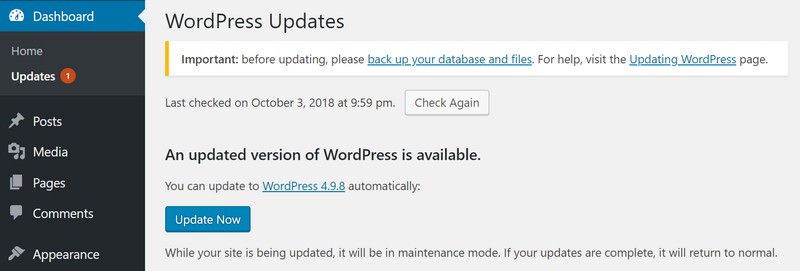
As a website owner, it’s your responsibility to keep your WordPress site, theme, and plugins updated to the latest version. Not doing this may make your website slow and unreliable, and cause you too vulnerable to security threats.
Use Excerpts on Homepage & Archives
Automatically, WordPress displays the full content of each article on your homepage and archives. This implies your homepage, categories, tags, and other archive pages will all load slower.

Another disadvantage of showing full articles on these pages is the fact that users don’t feel the need to go to the actual article. This could reduce your pageviews, and the time your users spend on your website.
In order to accelerate your loading times for archive pages, you can set your website to show excerpts rather than the full content.
Go to “Settings > Reading” and choose ‘For each article in a feed, show: Summary’ rather than ‘Full Text’.

Split Comments into Pages
Obtaining lots of comments on your website posts? Congratulations! That’s an excellent indicator of a good engaged audience.
But the downside is, loading all those comments can affect your website’s speed.
WordPress arrives with a built-in solution for that. Simply go to “Settings > Discussion” and check the box alongside the ‘Break comments into pages’ option.

Disable Pingbacks & Trackbacks
Pingbacks and trackbacks are considered by some as a legacy feature now, and they can cause slowness when it comes to page speed. With Ahrefs, Google Alerts, and other brand monitoring tools available nowadays, there are much better ways to see if someone has linked to your content.
You can disable pingbacks and trackbacks under the “Discussion” settings in WordPress dashboard. Note: this only applies to new posts.

To disable pingbacks on older posts you can use the bulk edit post feature and change pings to “Do not allow”.

Don’t Upload Videos Directly to WordPress
You are able to directly upload videos to your WordPress site, and it will automatically display them in an HTML5 player.
But you should NEVER do that!
Hosting videos will cost you bandwidth. You could be charged overage fees by your web hosting company, or they may even shut down your website altogether, even if your plan includes ‘unlimited’ bandwidth.
Hosting videos also increase your backup sizes tremendously and can make it difficult for you to restore WordPress from backup.
Instead, you need to use a video hosting service like YouTube, Vimeo, DailyMotion, etc, and let them care for the hard work. They have the bandwidth for it!
WordPress has a video embed feature built-in, so you can copy and paste your video’s URL directly into your post and it will be embed automatically.
Optimize Images for Website
This is probably the most overlooked aspect of website performance and at the same time, it can bring the biggest improvement to your website speed. If you never think about optimizing the image before you upload it to your WordPress site, then this is a great first step for your website loading time optimization.
Choose The Right Image Format
The most popular image formats used on websites are JPEG and PNG. You can save a lot on the image file size, by choosing the correct image format.
Now you might be wondering, what’s the distinction?
- PNG image format is uncompressed. When you compress an image, it loses some detail so an uncompressed image will have higher quality in more detail. The drawback is that it’s a larger file size, so it takes longer to load.
- JPEG, on the other hand, is a compressed file format which has slightly reduced image quality, but it’s significantly smaller in size.
So how do you decide which image format to choose?
- If your image or photo has a lot of different colors, then you use JPEG.
- If it’s a simpler image or you require a transparent image, then you use PNG.
The majority of the images which I use on this website are JPEGs.
Resize Your Images
Uploading big, unoptimized images, utilized in a small place on your website is a big NO. For instance, you have an image slot that will not be bigger than 600 x 400 px on your website and you upload a 1920 x 1080 px image (or even bigger!). Now, you continue doing this mistake a couple of times and your website will be very slow.
The first thing to do is resize the image to the right size. In this example, the image slot will never be bigger than 600 x 400 px, so you should resize the image to that size.
You are able to resize the images with an image manipulation program, like Photoshop or GIMP. In this way certainly will save resources and also keep you compliant with Google Pagespeed’s guidelines.
Compress Your Images
Image compression is a process of compressing the image file size without noticeably affecting its quality. I recommend TinyPNG, as it’s free plus very simple to use.

If you’d prefer to download a tool regarding optimizing images offline, I actually recommend that you get ImageOptim. This is another user-friendly, capable solution.

Delete Unused Themes and Plugins
Right now, you know how to pick the fastest themes and plugins and keep them updated all the time. This particular step is to make sure that you get rid of any themes and plugins you no longer need.
This is a website maintenance task you should perform regularly. Even though a theme or plugin isn’t active on your website, it will eventually still take up space on your server and cause unneeded strain. Plus, keeping unneeded content around can get a little confusing for administrators.
Luckily, cleaning out your themes and plugins shouldn’t take too long. The first step is to remove all deactivated plugins and themes you no longer need. Be aware that certain plugins will save additional data that won’t be removed, even though you delete the plugin itself. You may need to remove these extra files or shortcodes manually.
You should also ensure that you create a backup of your website before getting rid of any plugins or themes, just in case. This will make sure that you can go back to the backed-up version if anything goes wrong throughout the cleaning process.
Render-Blocking JavaScript & CSS
Among the optimizations that Google PageSpeed Insights suggests is also: “Eliminate render-blocking JavaScript and CSS in above-the-fold content”.

Generally, JavaScript and CSS scripts force the web browser to delay loading the HTML page. Of course, this is not a problem. In fact, that is exactly what you would want. No one wants to look at content that hasn’t been styled.
Render-blocking JavaScript and CSS, however, refers to those scripts, that expose load latency but are certainly not used in above-the-fold (ATF) content. ATF content refers to the section of the web page that is visible when the page is loaded. Any part of the page that you have to scroll down to reach is non-ATF. So, with this suggestion, Google is allowing you know that there are JavaScript and CSS scripts on this web page that are slowing it down needlessly, as the section of the page they impact isn’t observable to the user yet.
Follow this step-by-step tutorial to fix the Render-blocking JavaScript and CSS issue on your WordPress site.
back to menu ↑
Fine-Tuning WordPress for Speed (Advanced)
By using the WordPress optimization best practices and basic speed tips listed above, you should see a major improvement in your website’s loading times.
But every fraction of a second count. If you want to get the very fastest speed possible, you’ll need to make several more changes.
The following tips are a little more technical, with some requiring you to modify your website files and have a basic understanding of PHP. You’ll want to ensure that you back up your website first just in case.
Split Long Posts into Pages
Readers tend to love website posts that are longer and more in-depth. Longer posts even tend to position higher in search engines.
But when you’re publishing long-form articles with plenty of images, it could be hurting your loading times.
Rather, consider splitting up your longer posts into multiple pages.
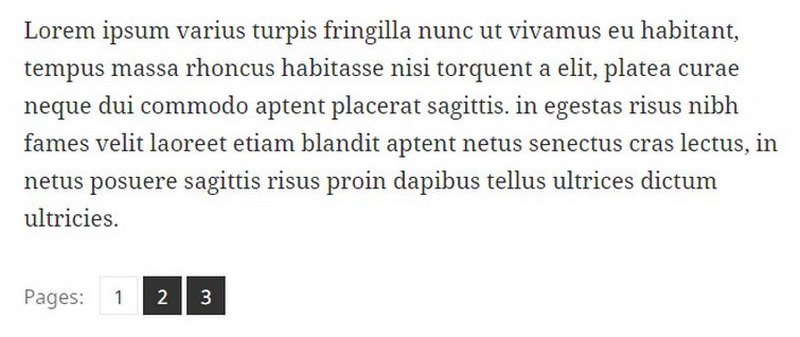
WordPress comes with built-in functionality to do that. Simply add the <!––nextpage––> tag in your article where you want to split it into next page. Perform that again if you would like to split the article on to the next page too.
Limit Post Revisions
Post revisions take up particular space in your WordPress database. Some users believe revisions can also affect some database queries run by plugins. If the plugin doesn’t specifically exclude post revisions, it might slow down your website by searching through them unnecessarily.
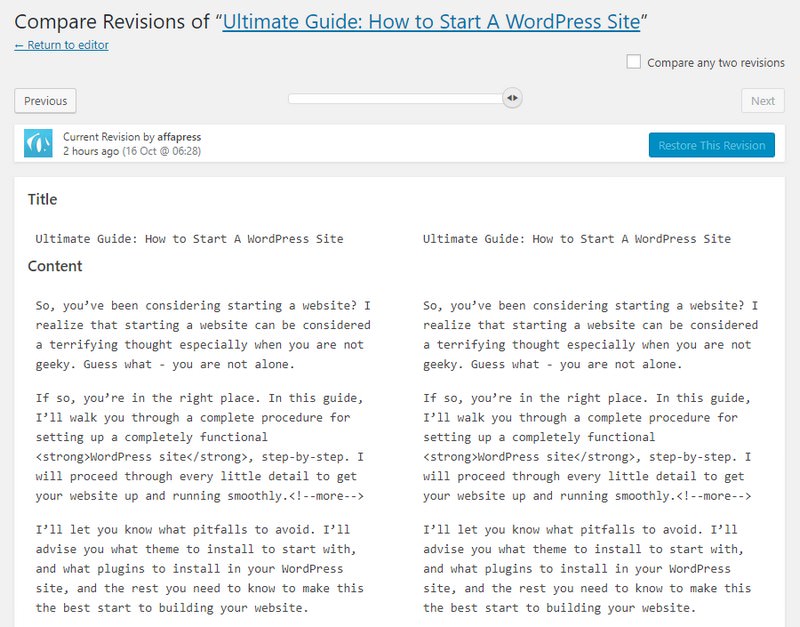
You can simply limit the number of revisions WordPress keeps for every article. Just add the line of code below to your wp-config.php file.
define( 'WP_POST_REVISIONS', 5 );
This particular code will limit WordPress to only save your last 5 revisions of each post or page and discard older revisions automatically.
Reduce Misc HTTP Requests
Reducing the number of HTTP requests that WordPress makes is very important. Stick to these instructions about how to fix the gravatar problem and the additional request to load emojis since WordPress 4.2.
Disable Gravatars
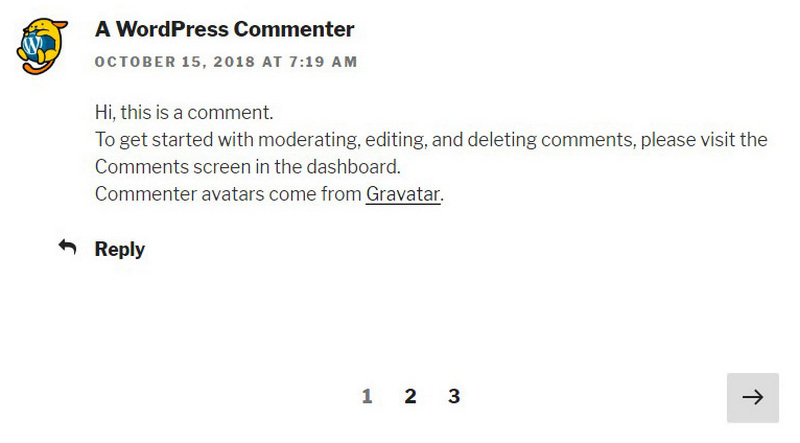
If you use the native WordPress commenting system by default it creates a separate HTTP request for every gravatar. If you have a lot of comments this can lead to tons of requests and unwanted redirects as seen in the example below:
![]()
The solution which can be applied to overcome this particular problem is simply to disable user gravatars and only use local avatars. This is not perfect, but how crucial is WordPress speed to you?
To get this done install the free WP User Avatar plugin. In the settings menu simply check “Disable Gravatar and use only local avatars”. Then choose a “Default Avatar”.
![]()
Disable Emojis
With the release of WordPress 4.2 came updates for extra emoji support. Unfortunately, this means that they are now including an extra JavaScript file wp-emoji-release.min.js in your header. This generates an unnecessary additional HTTP request, particularly when you don’t want to even use them.
Drop code below into the bottom of your functions.php file to disable emojis and remove that additional HTTP request.
/**
 * Disable the emojis
 */
function disable_emojis() {
	remove_action( 'wp_head', 'print_emoji_detection_script', 7 );
	remove_action( 'admin_print_scripts', 'print_emoji_detection_script' );
	remove_action( 'wp_print_styles', 'print_emoji_styles' );
	remove_action( 'admin_print_styles', 'print_emoji_styles' );
	remove_filter( 'the_content_feed', 'wp_staticize_emoji' );
	remove_filter( 'comment_text_rss', 'wp_staticize_emoji' );
	remove_filter( 'wp_mail', 'wp_staticize_emoji_for_email' );
	add_filter( 'tiny_mce_plugins', 'disable_emojis_tinymce' );
}
add_action( 'init', 'disable_emojis' );

/**
 * Filter function used to remove the tinymce emoji plugin.
 *
 * @param    array  $plugins
 * @return   array             Difference betwen the two arrays
 */
function disable_emojis_tinymce( $plugins ) {
	if ( is_array( $plugins ) ) {
		return array_diff( $plugins, array( 'wpemoji' ) );
	} else {
		return array();
	}
}
Disable Embeds
Since WordPress 4. 4, there is a new script that is loaded, wp-embed.min.js which allows you to more easily embed videos, images, tweets, etc. As an example, WordPress will automatically turn the URL into a YouTube embed and provide a live preview in the visual editor. Many people don’t use this feature or might not need it. You are able to link the original way by grabbing the embed code off of YouTube or Twitter. The big concern with this feature is that is loads the script on every page.
You can drop the following into the bottom of your functions.php file to disable embeds.
// Remove WP embed script
function speed_stop_loading_wp_embed() {
	if ( !is_admin() ) {
		wp_deregister_script( 'wp-embed' );
	}
}
add_action( 'init', 'speed_stop_loading_wp_embed' );
Disable Comments
When you are using threaded comments in WordPress the comment-reply.min.js script will be included on every post and page. There could possibly be times when you don’t need this script. Probably you don’t allow comments on your website or you utilize a third party commenting system like Disqus. In those cases, there is no need for this particular script to load on each page.
To disable this particular script you are able to drop the following code into the bottom of your functions.php file.
// Remove comment-reply.min.js from footer
function comments_clean_header_hook() {
	wp_deregister_script( 'comment-reply' );
}
add_action( 'init','comments_clean_header_hook' );
Implement a Content Delivery Network (CDN)
It doesn’t matter how big your WordPress install is or exactly how much traffic your website gets, everybody will benefit from implementing a Content Delivery Network (CDN). A CDN basically takes all your files (CSS, JavaScript, Images) and gives them on a server nearer to the visitor, which decreases the download time. Besides speed, a CDN can also greatly affect your visitors experience, your bounce rate, the time they stay on your website, your website SEO, and conversion rates.
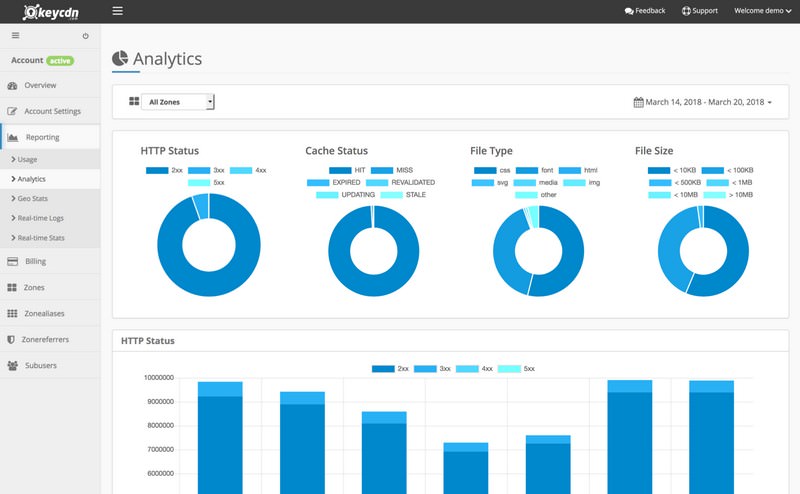
One of the best CDN services that I recommend is KeyCDN. They offer content delivery services via a pay as you go program. To quickly set up a CDN for your WordPress sites KeyCDN created a new light-weight plugin called CDN Enabler. It’s available free of charge and setup can be completed in a few minutes.
Load All Assets from WordPress CDN
Make sure that you load even the smallest of files from your CDN, like your favicon. In case you everything is loading from the CDN this creates one single connection. To tweak your favicon simply drop your favicon in the root of your WordPress install via FTP and then add the following code to your header.php file between the <head> tags.
<link rel="shortcut icon" type="image/x-icon" href="https://cdn.yourdomain.com/favicon.ico">
You can see from the example in the screenshot below that 100% of the assets are loading from the CDN.
Likewise, you can even load your gravatars from the CDN if configured properly.
Optimize Web Font Performance
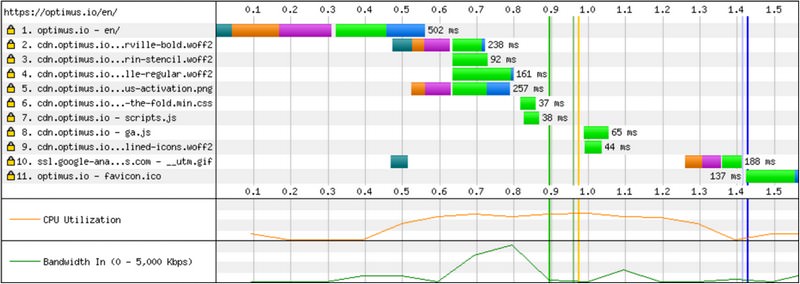
Like I wrote in my latest case study on analyzing web font performance, 57% of websites are now using custom fonts, that is an 850% increase since 2011. I noted that it is important to serve the particular fonts you need, such as WOFF and WOFF2 formats. Services such as Typekit base64 encode all the formats, which usually can boost download times and slow down your website.
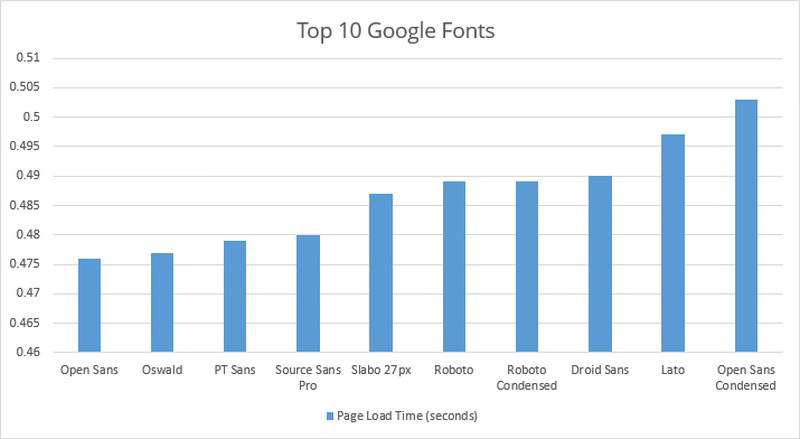
In my tests, Google fonts performed well due to the utilization of their CDN plus serving only WOFF formats. Open Sans was the fastest from the top 10 most popular fonts. If you intend for pure speed but still want to use Google fonts, the best combination in WordPress would be to use Open Sans and then a web safe font such as Arial.
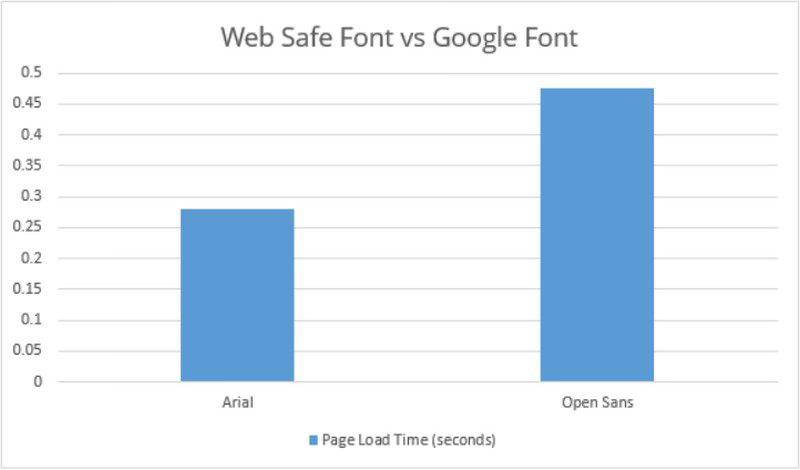
It is also essential to note the distinction between a Google font and a web safe font, as it has almost a 200ms distinction. This is mainly because of the download time of the font and the extra HTTP request to Google’s servers.
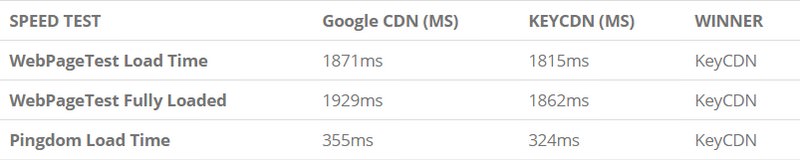
Another choice you have is to move your Google Fonts to your CDN. I tried to run my own comparison between using Google’s CDN and KeyCDN, and it was faster to use KeyCDN. Why? This occurs because it reduces the number of HTTP requests, DNS lookups, allows you to take benefit of a single HTTP/2 connection, and possess more control over caching.
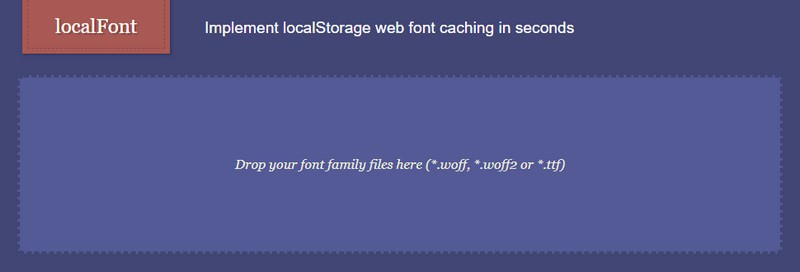
You can take it one step further by base64 encoding your fonts into one CSS file and store it in localStorage. A browser’s native cache will get flushed pretty frequently, specifically on mobile devices. Therefore by saving to localStorage, the file gets cached continuously. Smashing Magazine prevented a 700ms delay simply by using localStorage.
I suggest checking out the localFont tool by Jaime Caballero. You can quickly pull your WOFF fonts into his tool and it will base64 encode all of them and give you the particular CSS and JavaScript to put on your WordPress site.
Optimize Font Awesome Icons
With regards to Font Awesome, you can take benefit from your CDN to help speed up its delivery. If your theme already includes Font Awesome, you may need to tweak your theme for the following to work.
Host Font Awesome on Your Own CDN
Hosting Font Awesome from on own CDN will load from the same connection as your other assets producing in one less DNS lookup. And if you are running over HTTPS plus are on an HTTP/2 supported CDN server then it is better to combine your requests to one single H2 connection.
The first thing you require to do is ensure that your Font Awesome file is loaded relative to your initial CSS path. Using this method, as long as your Font Awesome CSS file is being loaded from the CDN, therefore will the font file. Here is an example:

The link to your Font Awesome file using the particular CDN URL should look just like the <link> snippet displayed below.
<link rel="stylesheet" href="https://cdn.yourdomain.com/css/font-awesome-4.4.0.min.css">
And that’s all, now you have a very fast loading Font Awesome icons!
Reduce Database Calls
Sadly, there are a lot of poorly coded WordPress themes out there. They ignore WordPress standard practices and ending up making direct database calls, or too many unneeded requests to the database. This can really slow down your server by providing it too much work to do.
Even well-coded themes can still have code which makes database calls just to get your website’s basic information.
In this example, whenever you see <?php, that’s the beginning of a new database call:
<html xmlns="http://www.w3.org/1999/xhtml" dir="<?php language_attributes(); ?>">
<head profile="http://gmpg.org/xfn/11">
<meta http-equiv="Content-Type" content="<?php bloginfo('html_type'); ?>" charset=<?php bloginfo('charset'); ?>">
You can’t blame theme developers for that. They simply have no other way to discover exactly what language your website is in.
But if you are modifying your website by using a child theme, then you can substitute these database calls along with your specific information to reduce all those database calls.
<html xmlns="http://www.w3.org/1999/xhtml" dir="ltr">
<head profile="http://gmpg.org/xfn/11">
<meta http-equiv="Content-Type" content="text/html" charset=UTF-8">
Review parent theme for examples like this that can easily replace with static information.
MySQL Performance Tuning
Improving MySQL is also very important. Sadly this is very specific to your environment and your setup so I can’t give recommended configurations. The MySQL/MariaDB configuration file is normally found in /etc/my.cnf file. Here are configurations though to keep an eye on:
- tmp_table_size
- query_cache_type
- query_cache_size
- query_cache_size
- join_buffer_size
- max_heap_table_size
A highly recommended tool is the MySQL Tuner script. It is read-only and won’t make configuration changes. It will give you an overview of your server’s performance and make some basic suggestions about enhancements that you can make after it completes. Here are a couple other tools you can use as well:
Resource Compression (Gzip or Deflate)
Files sent from your server (HTML, CSS, JS, etc) to your visitors can be compressed, so that they can be transferred faster, which boosts your page speed. This can be done by allowing Gzip or Deflate compression on your server.
You can contact your web host support and ask if they can allow resource compression for your website or you can configure it yourself, but be sure you know which server type your hosting is using. You can look at the HTML5 Boilerplate project for some tips, they have default server configs for every of the major server types. For example, my hosting is using an Apache server, so I found this compression config. I’ve copied the content of this config, I’ve located the .htaccess file for my WordPress site via the FTP (it’s in the root of your WordPress installation) and I copied it at the end of the file.
After I’ve enabled this resource compression, which did not take a lot of time. I’ve changed the total page size from 803KB to 476KB, which is awesome!
Disable Hotlinking Images
Hotlinking refers to someone direct linking to one of your images on their own server. This means that when someone visits their website it has to load the image through your server, taking up your bandwidth, and you don’t get any traffic to show for it.
Just add this code to your .htaccess file in order to block hotlinking of images from your WordPress site.
RewriteEngine on
RewriteCond %{HTTP_REFERER} !^$
RewriteCond %{HTTP_REFERER} !^http(s)?://(www\.)?yourdomain.com [NC]
RewriteCond %{HTTP_REFERER} !^http(s)?://(www\.)?google.com [NC]
RewriteRule \.(jpg|jpeg|png|gif)$ – [NC,F,L]
Note: Don’t forget to change yourdomain.com with your own domain.
Right after implementing hotlinking, images on external websites will appear as broken, a 403 error in the header.
back to menu ↑
Final Thoughts
The speed factor of your website matters a lot and really should be dealt with the highest care. Without taking the useful measure, you ending up possessing a drastically sluggish website with lost customers and subscribers. So, just get rid of unwanted elements and take away the right tools that aid in the growth of your website. Speeding up websites is important, not merely to website owners, but to all internet users. Faster websites create happy users and I’ve seen in my internal studies that when a website responds slowly, visitors spend less time there.
Throughout this guide, I’ve looked at some of the best methods for optimizing the speed of your WordPress site. When you implement these methods, your website will perform better, which can make your users happier and raise your conversions.
Did I miss any website optimization step, that you think can bring in essential improvements to the page load time? Let me know in the comments below!
- Readers Rating
- Rated 4.9 stars
4.9 / 5 ( Reviewers) - Spectacular
- Your Rating


