
So, you’ve been considering starting a website? I realize that starting a website can be considered a terrifying thought especially when you are not geeky. Guess what – you are not alone.
If so, you’re in the right place. In this guide, I’ll walk you through a complete procedure for setting up a completely functional WordPress site, step-by-step. I will proceed through every little detail to get your website up and running smoothly.
I’ll let you know what pitfalls to avoid. I’ll advise you what theme to install to start with, and what plugins to install in your WordPress site, and the rest you need to know to make this the best start to building your website.
Why Use WordPress?
Although WordPress is mostly used to make a blog-style site which is technically simply a series of posts with a specific date and time that they were posted, it can be easily adapted to suit static websites also, such as for your local business, artist portfolio, or perhaps an online shopping site. As you explore WordPress, you’ll find that there’s a WordPress plugin to create literally any type of website you could possibly think of.
WordPress isn’t the only CMS around though, so why choose WordPress?
- It’s feature rich – So with the basic installation, you ought to be capable of everything you want to. If something is lacking for your particular requirements, it’s highly likely there’s a plugin already designed to handle it for you. The upshot is, you don’t need to code anything.
- It’s mature – Created in 2003, it’s had an extremely long life up to now and is still in active development. This isn’t buggy new beta-release software, it’s extremely stable.
- It’s secure – Much like any piece of software or operating system, there were a few serious hacks through the years but the developers have been on top of them quickly. The most recent versions include prominent warnings when a new version is available, therefore long as you regularly check your website and update when needed, there’s hardly any chance of your website being hacked.
Still not convinced?
- It’s incredibly easy to install.
- There are actually thousands of plugins to add functionality.
- Image and media management out of the box for instant portfolio and photo-driven sites.
- Simple coding for core functionality helps it be easy for newbie developers to customize their website at a code level (however I won’t be addressing any coding in this guide).
So, you’re ready to start a WordPress site? Let’s get started!
Affiliate Disclosure: This article contains affiliate links, which means Affapress earns a small commission whenever you end up purchasing products we recommend. However, the opinions written are only based on our experience and not how much they pay. Please continue to support our work and learn more about our affiliate links policy.
1. Choose Your Website Niche
As someone who will start a new website, you may be a little uncertain about how exactly to get started. Especially if you would like to gain a big audience or earn money from your website, you can simply get overwhelmed by the number of decisions you have to make, such as:
- What exactly are you going to write about?
- What products and services will you sell to site visitors?
- How will you stick out from the competition and make your mark?
Okay, so that’s a few problems to be solved first. However, the point is, all of this boils down to what niche your website is likely to be based in.
There are lots of ways to find the perfect niche for your website. Actually, there are some concrete steps you can follow that will lead you down the right path and help you create a successful website.
1. What is your interests and passions
Before you break right into a website niche, think about what you’re interested in and passionate about. Because you will be responsible for creating consistent content about that topic, it must be something you’re interested in and have a lot to say about. What’s more, your website content will sound more genuine and less such as a sales pitch when you are passionate about your topic.
Therefore, you can start by making a list of your interest, passions, and hobbies. Then concentrate on the ones you have something unique to say about, which you think you can write about for a long time to come. You may even want to think about your goals at this point. If you intend to monetize your website, for example, you will need to make sure your niche is profitable (more concerning this in a moment). Alternately, you might be looking to increase awareness about a concern, or share educational information. Whatever you want to earn from your website, your niche should be able to provide it.
2. Check popularity of your topic
You have a list of possible website topics now, it’s time for you to refine it. In this step, you retain only topics which have a large potential audience you can reach. By choosing a popular topic, you will have more potential readers, thus more chance to monetize your website in the future.
So, how do you estimate the popularity of the topic? Well, you can start with examining the popularity of search terms related to a topic, social shares about the topic, etc. Below are a few tools which you can use to do this step:
This free tool is a part of Google Adwords, therefore you will require an Adwords account (you can create one for free). You just enter keywords related to your chosen topics and you can immediately see how often people search for related keywords. Here is the sample screenshot for the search term “camera”:

This tool gives you relative search volumes for search terms. You can utilize it to compare the popularity of topics, is the popularity increasing or declining and so on. For instance, this screenshot shoves the popularity of two possible website topics:

You can obviously see which one is more popular. Google Trends also show you if interest specifically search is increasing or declining.
This is free Firefox and Chrome plugin which shows search volume instantly, CPC (Cost Per Click) and other useful information for all of your search queries. This tool can be utilized by you to estimate which search terms are most used, what is the difficulty to rank in search engines for them and etc. Here is the in-action screenshot for the search term “keyword research tool”:

When you type your search in Google search box, Keywords Everywhere shows you average monthly searches for that query, along with CPC (Cost Per Click) and competition. You can use both of these values to measure popularity and competition of search queries related to your niche.
Furthermore, Keywords Everywhere shows similar searches which you can use to help expand examine the popularity of your website niche. By combining all these search information, you can have a very good picture of the popularity of your selected topics.
Besides using these tools, sites like Quora and Reddit are a great reference to find website topics. All you should do is search these sites for categories related to your selected website niche, and check how popular these topics are on them. Look for things like the number of followers, number of questions, how often questions are submitted and replied.
Following this step, you ought to be able to determine which of your potential website topics are most popular. Cross off any topics which do not pass popularity filter.
3. Research your competition
Competition is a double-edged sword, too much means it’ll be hard to get your website noticed, and too little means that your chosen niche might not be quite profitable.
The easiest way to assess your competition is to do Google searches on websites in your niche. For instance, search “world travel blogs” should give you top results for blogs about traveling the world.
Proceed through these search results and try to examine each one of these websites. Look for patterns, similarities, and differences. See what these websites have in common, and exactly how they are different.
After you get the idea of the competition, you might want to think of chances in two areas:
- Differentiate yourself – Take note of what your competitors are doing that is prosperous, and try to approach that from a different perspective. You might like to try different writing style, concentrate on specific sub-niche or something else. Brainstorm possible methods and find out what you can come up with.
- Make connections – In the online world, you desire to be on good terms with fellow website owners. Be a regular visitor to your competitor’s sites. Make contributions in form of comments or even guest posts maybe. Subscribe to their social media channels. Make an effort to encourage them to notice you.
Carrying on with the list of topics from previous two steps, narrow it further to topics considering factors defined in this step. Concentrate on niches where you think you can make a dent in competition and get your website noticed.
4. Choose the niche for the long term
Your website exists is to provide your readers value. But, you don’t want to provide your readers a solution to one particular problem, because after they solve that problem they won’t need you any longer.
Instead, you want to concentrate on topics that improve your readers lives continuously. You intend to make them coming back for more.
From your list of remaining topics, proceed through each of them and think of possible topics for individual website posts. See if you can produce at least 30-50 titles for one topic. This way, you make sure you can have sufficient material to keep serving your audience with great content.
Hopefully, following this exercise, you ought to have one topic that would be your website niche. If you still can’t choose a niche, don’t sweat it. Get your website up and running, and start writing. After a few posts, you will likely have a good idea about your website niche.
back to menu ↑
2. Setup Domain & Hosting
Once you’ve chosen your website niche, the next big step is choosing a domain name and web host provider.
Keep in mind, in this tutorial post I’ll assume that you’re completely new to blogging and setting up a WordPress site, so let’s first look at what a domain name and web hosting actually are.
What is a domain name and why do I need it?
A domain name is merely the address of your website. For instance, the domain name for this website is https://www.affapress.com.

When someone wants to access your website, they’ll simply enter the domain name address to their browser: www.yourdomain.com.
Or, they could click on a link to your domain name from another source, like a link on another website, or from the search engine search result pages, or from a post shared on social media, etc.
Below are a few top tips to bear in mind when choosing a domain name for your website:
- Choose a domain name which is the same as your website name.
- Choose a domain name that is ‘unique’ and ‘memorable’.
- Stay away from hyphens in your domain name.
- Utilize a top-level domain name extension such as .com or .net.
You can buy a domain name from any reputable online domain provider such as GoDaddy. However, since you’re setting up a WordPress site for the first time, the simplest way to buy a domain name is actually with your web host provider.
What is web hosting and why do I need it?
Think about a house is built on a piece of land. You go through a real-estate agent to buy land for your house to be built on, right?
Well, it’s the same basic principle for a website. A website requires web space, which is provided by a web host provider/company.
To keep things more simple, when registering for a new account with a web host provider, all you actually need is the basics.
From the many web host service providers, I use and recommend SiteGround for your domain name and web hosting.

Why You Should Choose SiteGround?
SiteGround offers three shared hosting packages. For a brand new website, I would advise the StartUp plan. As your website starts to grow in popularity and starts consuming more resources, you might like to upgrade to a GrowBig or GoGeek account.
OK, so here’s a step-by-step guide on how to get signed up with SiteGround.

- Account Information – Provide your email address and choose a secure password of your decision.
- Client Information – Input information about yourself such as your name and address, company, phone number, etc.

- Payment Information – Add payment details you use such as credit card information. Check the box if your card details are the same as the address you used above.
- Plan Information – Choose the plan you intend to purchase, select the data center, period of hosting required to finalize the hosting price.
Once you’re all done, click the “Pay Now” button to open your SiteGround account.
back to menu ↑
3. Installing WordPress
OK, the fun starts from here! You have everything needed to install a new WordPress site. This step will take simply a few minutes, so don’t give up now.
To get this done you will use the “one-click install” feature which is a simple feature that most web host providers offer today.
The “one-click” feature means that you can install WordPress into a domain name of your decision, through a hosting provider of your decision, with just a single click of the mouse.
Back on that day, you would have to install WordPress via FTP. What a pain that was.
You are able to still do that today, of course. However, it is a bit technical to do as a newbie. Instead, you’re going to install WordPress with using a single click of the mouse.
Let me show you how to install WordPress on a new domain name easily using SiteGround web host.
Step 1 – Log into your SiteGround account and go to “My Accounts” tab, then click the “Go to cPanel” button.

Step 2 – Scroll down and click on the WordPress icon located in “Auto Installers” section.

Step 3 – Click “Install” and then enter the details for the installation. You should always choose the ‘https://www.’ protocol where possible, and then choose the domain name in which you want to install WordPress.

Step 4 – Continue with the setup by giving your website a name, site description, and admin username + password.
Keep these in a safe place incidentally. You’ll need them to log into your website after the installation is complete.
Choose an admin email and language, then choose the security plugins you would like to have installed with your initial setup.
The “Limit Login Attempts” plugin is strongly suggested, I use this plugin myself. It will help you monitor and block brute force login attempts made on your website, including the responsible IP addresses.

Step 5 – When you’re all done, just click the “Install” button and allow magic happen.
Once the installation has finished, you will be notified. You should then have the ability to log into your new WordPress site by heading to https://www.yourdomain.com/wp-admin/ using the username and password you have created previously.
back to menu ↑
4. Configuring WordPress
After successfully installing your new WordPress site, you need to set up it for optimum performance and security.
Configuring WordPress Basic Settings
WordPress organizes your website settings on the left sidebar within the “Settings” section. This section is broken into various sub-sections for your website. In this next bit, I will make several suggestions for setting changes plus describe a few which I feel are important and valuable.

General
In the “General” sub-section, you will see basic settings for your website. First, make sure your ‘Site Title’ and ‘Tagline’ are precise to reflect you and your brand. Next, make sure that your ‘WordPress Address’ and ‘Site Address’ are precise to the domain you have chosen in earlier steps. Input the primary ‘Email Address’ which will be used for website notifications (comments, updates, etc).
The following two fields are for if you wish to have a membership type website that requires readers to create a user profile. On many of my websites, ‘Membership’ is left unchecked, and ‘New User Default Role’ is left as Subscriber.
The next section defines ‘Site Language’, ‘Timezone’, ‘Date Format’, ‘Time Format’, and ‘Week Starts On’. Select the settings that best identify your online business and the readers of your content.
Writing
In the “Writing” sub-section, you can change the settings related to content creation. First, you can change ‘Default Post Category’ and ‘Default Post Format’ (this would assuredly be a good idea if you have a custom category that is intended as a catch-all to your content, also changing ‘Default Post Format’ would be helpful in unique and niche situations).
The ‘Post via Email’ and ‘Update Services’ are also used in some instances and can be left in their default settings for now!
Reading
In the “Reading” sub-section of the settings, you will see changes related to how your content is presented on your website. The first selection is ‘Your Homepage Displays’, this will define the overall construction of your website. Exactly what do you want to show on the homepage? Would you like your blog-stream or a custom homepage? The decision will determine your platform as either a BLOG (your latest posts) or a WEBSITE with a BLOG (a static page). I suggest the latter option (for an online business) because of the versatility offered in a website format rather than a blog. If you determine to go with the Static Page setup, you will require to define your HOME and BLOG pages [more on pages later].
Within this sub-section, you will also be defining how many of the most recent posts you want to show and the summary displayed for every single (for my websites, the default settings here are excellent for the number of posts, another setting pertain to RSS feeds and can even be left as default for now).
The last setting in this sub-section is ‘Search Engine Visibility’ when you are still building your website, pre-launch, it is necessary that this is checked to ensure that Google doesn’t send traffic to your unfinished website. Right before you launch it is so important for Search Engine Optimization (SEO) purposes to uncheck this checkbox.
Discussion
The “Discussion” sub-section relates to how your audience can connect to your content. Becoming a big section and the settings eventually being preferences, I will present a few considerations which should guide your selection of preferences.
First, comment management will be a major part of established websites. The interaction between you and your audience is crucial to ensure the success and growth of your brand. Establishing your comments is a huge part of that success (or failure) to this effort. I would first recommend that you moderate ALL comments on your website. This will make certain you have quality, interest-building discussion on your website (and prevent SPAM and other improper comments that can end up on your website).
Overall, the default settings are set up to allow you to win with readers interaction, only minor changes would be needed in specific situations.
Media
The “Media” sub-section is related to your digital content (how it will be displayed on your website as well as how it is organized within the WordPress system). This section is quite short and doesn’t need any changes unless you feel it is required.
Permalinks
The “Permalinks” sub-section is related to your URL structure of individual posts and pages on your website. My recommendation is to choose ‘Post Name’ for your structure, this will make sure for better SEO and URL slug management. The other settings are for changing the wording of ‘categories’ to something custom like ‘topics’ or ‘projects’.
Privacy
The “Privacy” sub-section is a brand new one which came with the new changes in internet privacy (GDPR 2018). This particular subsection will help you create and define the Privacy Policy of your website.
Delete Sample Posts and Pages
Once you install a new WordPress site, it comes with some sample content, specifically one post and page. These are the ones you see when you load your brand-new website and are utilized to showcase WordPress capabilities.
To be honest, you don’t need this sample content, since it just takes up space and it looks unprofessional to have content such as this on your website. You will create new pages you need for your website in the next part of this guide. However, for now, you are going to delete this sample content.
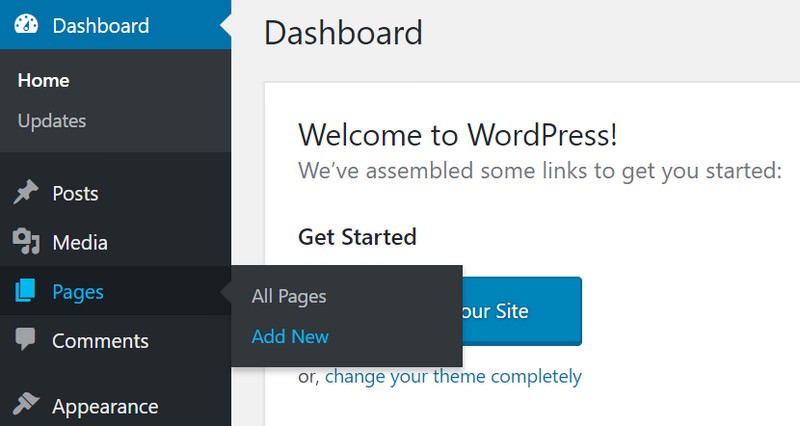
To delete sample pages, select “Pages > All Pages” from the main WordPress menu. You will be presented with the list of existing pages, as in this screenshot:
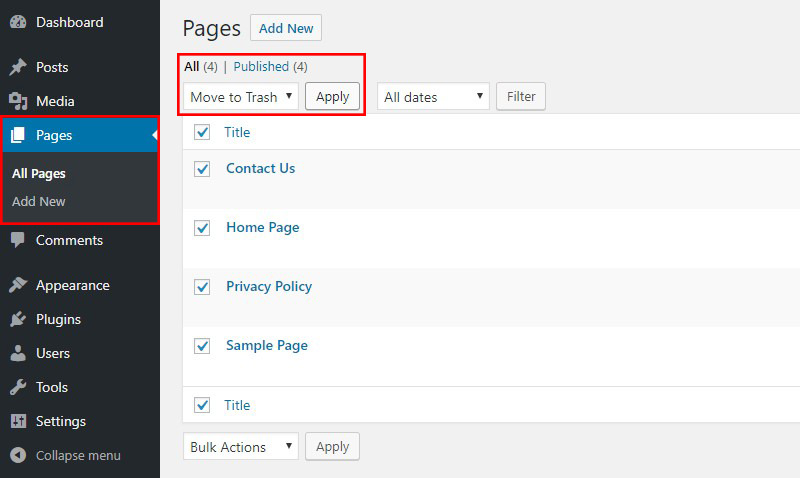
You will now need to perform these steps:
- Click on the “Title” checkbox, as shown in the screenshot. This will select all pages.
- From “Bulk Actions” select box above, select ‘Move to Trash’ option. Bulk actions permit you to perform actions on multiple selected items. In this case, you want to move all selected pages to trash.
- Click on the “Apply” button. It will perform selected bulk action on the selected items.
You will have to repeat the same process to delete the sample post. To see the post, simply choose “Posts > All Posts” from the main WordPress menu and repeat the steps above.
Remove Unused Themes
Aside from adding clutter, unused themes can pose a security risk and also have a negative impact on performance. Therefore, let’s remove all inactive themes. Firstly, navigate to “Appearance > Themes” in your main menu. You will have a page similar to this:

To delete a theme, you must follow this steps:
- Hover your cursor over an inactive theme you want to delete (an active theme is marked with “Active” label). A button “Theme Details” will appear. Click it and you’ll be taken to the theme details page.
- On the theme details screen, look for red “Delete” link in the lower right corner. Click it and theme will be deleted.

You will need to repeat this process for every single theme you want to remove. Make sure you leave active theme, so your user interface keeps working until you set up a professional theme for your website.
Remove Unneeded Plugins
Each WordPress installation comes with a few plugins installed by default. For instance, Akismet and Hello Dolly are default plugins for all those installations. Some hosting providers (such SiteGround) also add a selection of their plugins which they consider helpful for their customers.
Whether these plugins are useful or not is open up for debate. My suggestion is to remove them and start installing plugins from a clean slate. Only install plugins which you really need and prevent duplicating the functionality of different plugins. In case you are not certain which plugins you need, stay tuned on this guide, as I have covered this topic in the next section.
To delete default plugins, choose “Plugins > Installed Plugins” from the main menu. You will be taken to the plugin management page:

Exactly like before, choose ‘Delete’ from “Bulk Actions” select box, and click the “Apply” button. WordPress will now remove all installed plugins.
Now you have a clean slate to install plugins needed for your WordPress site from scratch.
That’s all! Your WordPress site successfully configured for optimum security and usability. In the next part, you will take care of the appearance and make it pretty for your readers.
back to menu ↑
5. Selecting A WordPress Theme
By itself, WordPress is simply a content publishing/management platform. A theme is also known as a skin which makes each WordPress site unique and different.
Simply by default, WordPress uses their own set of themes (Twenty Seventeen theme), along with a host of other themes in the theme file. So, when you first visit your website, it will look something like this:

This is simply not very appealing to most people.
Customizing the look and feel of your website is definitely one of the most exciting and rewarding parts in the journey of creating your WordPress site.
There are thousands of pre-made WordPress themes that you can install on your website. Many of them are free, while there are some paid.
You are able to change your theme by going to your WordPress dashboard and simply clicking “Appearance > Themes”.

Go on and click on the “Add New” button.
On the next screen, you will able to search from 6400+ free WordPress themes that are available in the official WordPress.org theme directory. Moreover, you can sort by popular, latest, featured, and also other feature filters (i.e industry, layout, etc).

You can hover over to a theme and you will see the “Preview” button. Clicking on will open up the theme preview where you can easily see how it would look on your website.

The particular preview of your theme might not exactly look as shown in the screenshot, which is normal as you will definitely get to customize and set it up later. Exactly what you need to look for is design, colors, typography, and other elements.
The best tip to choose the perfect WordPress theme is to strive for simplicity in design. This helps you keep things clean and clear while offering a good experience to your users.
Once you have found the theme that you like, simply bring your mouse on it, and it’ll show the “Install” button. Simply click it and wait for the theme to be installed. Then the “Install” button will be replaced with an “Activate” button. You need to click it to activate the theme.

After you have installed your theme, you can customize it by clicking on the “Customize” link under the “Appearance” menu.
Once you have selected and activated your WordPress theme, you are now ready to create your first post.
Installing a Premium WordPress Theme
If you are searching for a more personal look and feel for your WordPress site, I would recommend by using a premium, customizable theme such as Genesis Theme Framework.
I recommend this theme framework because it is one of the most, if not the most well respected and popular theme framework for WordPress site which is included with elegant responsive design, speed, in-built SEO, etc.
Installing a Genesis Theme
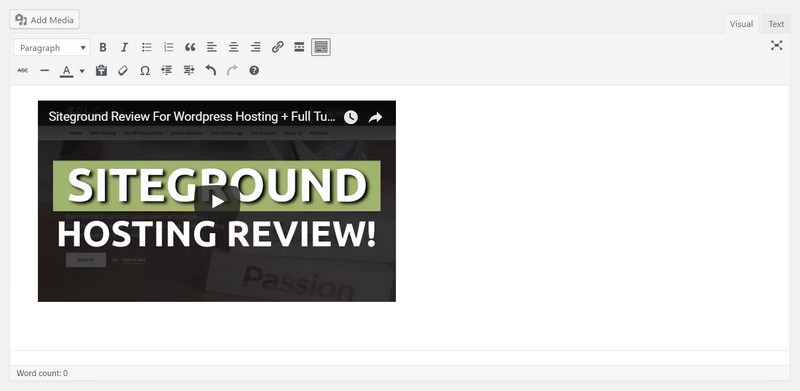
If you happen to choose Genesis, here’s a quick video tutorial about how to install the theme into your new WordPress site.
The other option you have is to employ a WordPress developer to help you create a very specific design and layout for your WordPress site. However, this can be costly and when you’re just starting out, you’re probably better off going for a premium WordPress theme for the time being.
back to menu ↑
6. Creating Posts & Pages
WordPress is the best platform with regards to managing your content. WordPress does this through its POSTS and PAGES. The MEDIA is arranged separately for use in both posts and within pages.
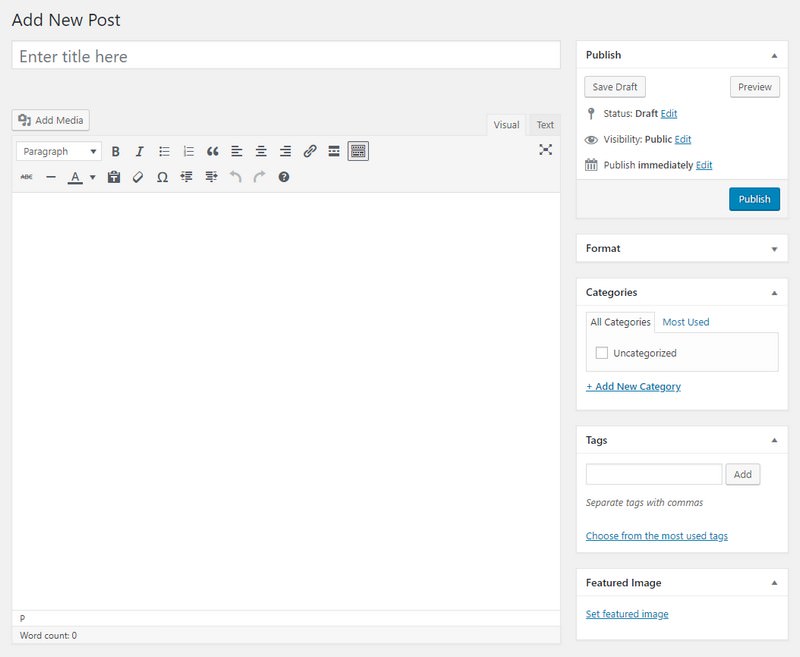
Write a New Post
To create a new WordPress post, hover over “Posts” menu on the left sidebar and then click “Add New” link. It’s that simple. In the admin area, there’s also a button to write a new post in the top, namely by hover over and hit the “+ New > Post” link. Things should be self-explanatory from there.

Right now there are two edit modes when writing a post:
- The Visual Editor shows the HTML styles, not the code itself, it attempts to interpret the markup as a browser would.
- The Text Editor allows you to write and modify the HTML yourself but does not show you the results (i.e the styles) on screen.
On the posts screen, you will see several other sections such as “Categories” and “Tags”. You can use these to organize your website posts.
The final article will rely on your theme template of course, which is why there’s also a “Preview” button to see your finished piece in context and make adjustments.
Upload an Image
In the post edit screen, click on the “Add Media” button to open the picture upload dialog.
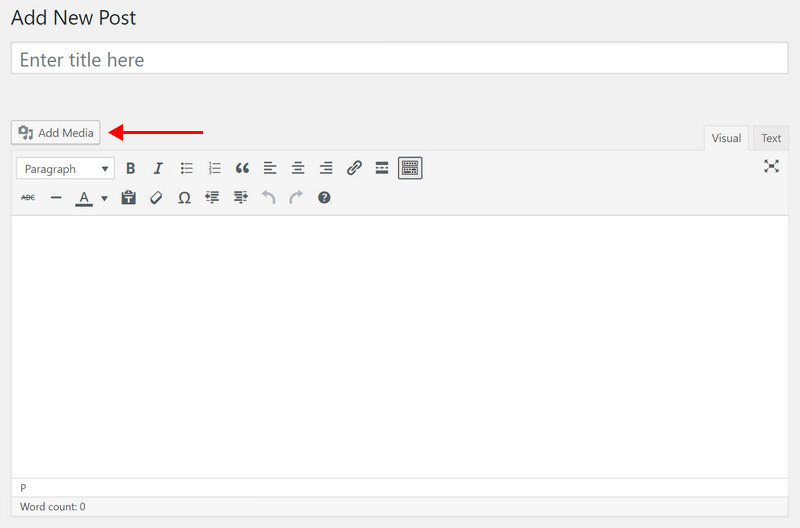
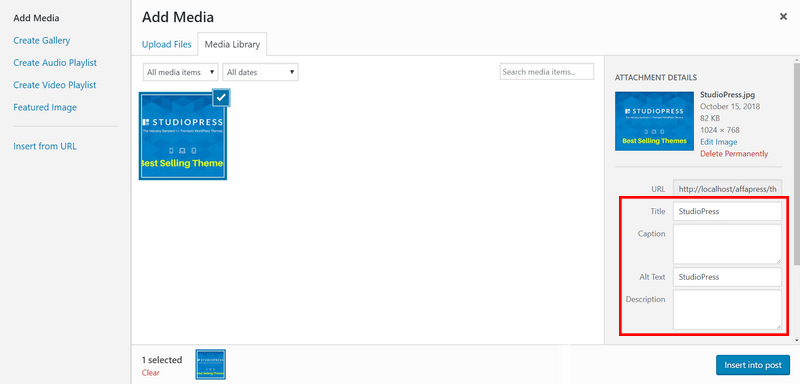
Right after choosing a file on your local machine and clicking “Upload”, you’ll be presented with this somewhat complicated screen, so let’s look at that in a little detail.
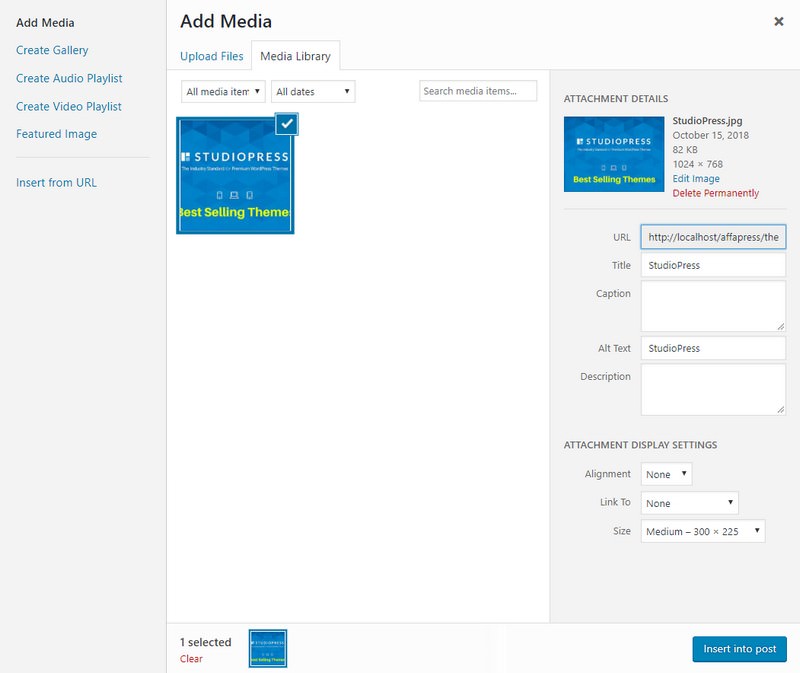
To start with, the “Edit Image” link is quite useful, allowing you to crop, rotate, and resize the image. It’s easy to overlook though, and for the most part, you probably won’t require it. Following on down the screen are some text fields that you can enter. If you add a ‘Caption’, it’s going to be displayed on your page underneath the picture. The ‘Title’, ‘Alternate Text’, and ‘Description’ however are concealed. They will be used for either browser that can’t display images or users with vision impairment, or by Google when people perform a picture search. Setting them is not required other than a title, but if you have a photograph you’re proud of or perhaps a picture you created (like an infographic), then it’s really worth setting them.

Next, the “Alignment” determines if the text flows around the image (left or right), or it sits alone, either with the default none or in the center of your page. Again, if you’ve setup image sizes to fit your page perfectly, you shouldn’t actually need this. When an image is merely half the width of your full content column though, it often looks better left or right aligned with the text flowing and helps to avoid dead whitespace.
The “Link To” determines if users can click on the picture for a larger version or not. If you would like nothing to happen, choose ‘None’. If you’d like them to be able to open up the full version of the picture, choose ‘Media File’. The ‘Attachment Page’ will link the image to its own page (the attachment page), which appears just like a regular post but only consists of that picture. Since you’ll generally be inserting images at a good size fit for the theme, linking to a separate attachment page is fairly redundant – best to link to the ‘Media File’ (full file URL) if you do actually want users to be able to see the full image at all.
The “Size” is an important option. These sizes are determined by your theme or set by you from the “Settings > Media” page. Though it’s an issue of personal preference, I actually prefer to set the ‘Medium’ size as the perfect fitting for my content column, with large size left at the default high resolution – this provides me the choice of creating a gallery-like view of photos should I wish to at some point.
When you’ve set all the appropriate options, you can continue and insert the image to place it wherever your cursor was last in the text. I know the process of image uploading can seem to be a little unwieldy, but your settings are kept in mind so almost all of the time you actually just need to hit “Upload > Insert”.
Finally, the “Featured Image” is the image you have chosen to represent that post. Rely on your theme, it may or may not be used as a thumbnail throughout. Even if your current theme doesn’t utilize it, it’s good practice to set the featured image in case you upgrade at a later date to one which does or decide to hack in the functionality in your existing theme by yourself. Regarding a shining example of featured images being used, check out of my blog – those thumbnails you see are all functioning as a featured image.

Adding YouTube Videos
WordPress has a little magic to deal with this. Rather than laboriously heading to YouTube, expanding the share tab and finally copying and pasting the object embed codes – just paste the URL of the video directly into the “Post Edit” screen instead. When published or previewed, WordPress will automatically embed the video. No messy code, no complicated embeds, just copy-paste the URL and let WordPress do the hard work.
Once you’re done writing, go ahead and click on the “Publish” button on the right to publish your new WordPress post to the world.
Create Important Pages
To write a new WordPress page, it’s exactly like creating a new post, hover over “Pages” menu on the left sidebar and then click “Add New” link. Whether in the admin area, there’s also a button to write a new page in the top, namely by hover over and hit the “+ New > Page” link. Then write your content, once you’re done writing, go ahead and click on the “Publish” button on the right to publish your new page.
But before you start writing the pages you want, there are several really important pages every website should have. Many of them are just common pages users expect to see on your website, and others are legal stuff required in some jurisdictions. So, what are the pages you need? Read on!
About Page
I actually gamble it never crossed your mind that you need an About page for your website? Allow me to tell you:
One of the marketing gurus, Neil Patel has written a considerable post about the importance of About page, and this is the guy who knows what he’s talking about. He’s one of the most successful Internet marketers today, and you should definitely pay attention to what he has to say.
Your About page should let your visitors know who you are, what you do and, most importantly, what you can do for them. In conclusion, your About page must have the following elements:
- Headline – Give your readers a one-line description of what you do, and the benefit they get from reading your website.
- “What’s in it for me?” – Primary content of your About page should answer this question for your readers. Let them know well what you can do to make their life easier.
- Credibility – So why should your readers listen to what you have to say? This is your opportunity to show any credentials, testimonials, and achievements you may have to boost your trustworthiness.
- Images – Adding some images will help your readers relate with you and increase trust.
At this stage, you should not be worried about the design, but more about content and grabbing the attention of your readers.
Contact Page
Another necessary page for your WordPress site is Contact page. This is a page that contains contact form, so your readers can get in touch with you. Why is this important?
Having a successful website is all about having engaged readers. When your readers are willing to contact you, it means they participating. Plus if they want to contact you, you want to make it as effortless for them as possible.
For your Contact page, you will need a contact form. When users fill up this form, you will be notified via email which means you can respond to their inquiry. To get the working contact form, you will have to have a WordPress plugin. Right now there are a lot of them, but I recommend WPForms.
WPForms is an extremely good and user-friendly form plugin. It is free in its basic version and enables you to create various forms easily for your website.
Terms of Service
At this time, you are probably thinking “Terms of Service? WTF? Why would I need that for a simple website?”.
Well, odds are, you will probably never need it, however in the case you do, you would be glad you have one. Having Terms of Service page can help you save a lot of headache down the road. Especially if you plan to monetize your website and accept payments. In these instances, the TOS page is extremely important.
What should this page contain? That is determined by your jurisdiction, type of the website you run, your monetization strategy and so on. The best idea is to have a lawyer to draft the Terms of Service for you. In a nutshell, it should lay out the rules on what users use your website and include a disclaimer for any liability you might be facing.
But, if you need a basic legal cover, you can use this free Terms of Service Generator Tool. You just need to fill out the form with your basic data and this tool will generate Terms of Service content for you. You then only need to insert this content into your website page.
Please note that this is extremely common TOS and may be completely incompatible with laws and regulations in your country. In case you want proper legal cover, I strongly advise you to talk to a lawyer who is familiar with the laws and regulations in your jurisdiction.
Privacy Policy
Exactly the same story as above pertains to Privacy Policy page. This is another page you will most likely never need but will be pleased you have it in the event you do need it.
On the Privacy Policy page, you should inform your users about the following:
- What personal data you might be collecting?
- How do you store this data and for how long?
- Do you share this data with third parties?
- Let users understand how they can see this data and request it to be deleted.
- In case you use any tracking codes, like cookies.
Appropriate Privacy Policy page would need an attorney to write it, but you can also use this free Privacy Policy Generator Tool. Once again I must mention the disclaimer that this generated policy might not cover all facets and you should contact an attorney for proper legal protection.
back to menu ↑
7. WordPress and SEO
The majority of beginners don’t optimize for SEO when starting a website. SEO or search engine optimization helps users find your website in search engines. If you want more traffic, then it’s crucial that you improve your website for SEO from the beginning.
However, no-one can definitely know how the Google ranking algorithm works, and it’s for that reason that attempting to game the system is foolhardy at best. Exactly what you can do is follow a set of best practices published by Google itself, listen to advice from those with experience, and make your own decisions. Ultimately, much of SEO is simply common sense, and as long as you write quality content for which the content is definitely identifiable by humans then you should do just fine.
General WordPress SEO Tips
The very first thing you should do when launching a new website is to get a personalized, unique, relevant domain name – www.yourdomain.com.
Depending on the sort of website you’re planning on making, the domain name is a good method to get a head-start along with your Google rank. Generally, ‘exact match domains’ are usually a key sign to Google that your website is relevant to a particular topic. All things being equal – an actual match of the domain name will always win out against something generic. Sub-domains don’t count, by the way.
Set Correct Meta-Tags for Title and Description
The ‘page title’ is what appears in the user’s browser at the top of the screen and the title shown in Google search results. WordPress does quite well by default on titles, but you should avoid any that are too long or else you may want to modify the structure slightly. The ‘meta-description’ is not human-readable on your website itself, but it is utilized by Google in the search results page if you have one. If the description isn’t set, Google will attempt to extract some part of your page that it deems relevant to the search query (in fact, it might do this anyway and just ignore your properly crafted description if it thinks it isn’t relevant to the user at hand), so ensure you set one.

Automatically, WordPress doesn’t set a description, so you’ll require a plugin for this which I will describe later.
Use Images to Your Advantage
One easily ignored area of incoming search traffic is from Google Image Search. In one site I’ve handled, the traffic shot up 100-fold a night because of a single image related to recent news. Knowing that you can leverage images as an untapped source of traffic. Specifically, the image TITLE and ALT tags need to be set so they are relevant to your keywords. If your page is about ‘feeding chickens’, and you have an image of a feed mix you made, with the filename ‘IMG1.jpg’, and no TITLE or ALT tags set, you throw away big traffic opportunities.
An easy way to ensure you utilize this is to fix the relevant fields when you upload images using the WordPress Image Uploader, but what if you’ve forgotten to accomplish for your entire existing posts? In that case, install the helpful SEO Friendly Images plugin. It will automatically add relevant tags to each of your images, in accordance with the title of the post they’re attached to – it’s not ideal, but certainly much better than nothing.
Avoid Duplicate or Low-Quality Content
It should go without saying that copying someone else’s content is a sleaze, but numerous websites would previously perform this automatically simply by ‘scraping’ RSS feeds. As well as WordPress plugins that will do that for you. Make simply no mistake though, this practice is currently easily recognizable by Google and results in a swift de-indexing of the offending site. It is therefore absolutely important that you don’t duplicate content through another source. Ensure your website posts are original! This doesn’t mean you can’t embed YouTube videos or quote another page, but ensure you do something else in addition.
You should also ensure that every page of your website provides a considerable amount of good content. Google will certainly penalize you for ‘low-quality’ content if you publish a post with simply two or three sentences on it. So does this mean you can’t write-up little thoughts or links you find? No, however, it does mean they shouldn’t be a single post. Consider utilizing the ‘asides’ post type of the default Twenty Seventeen theme which displays the posts on the particular blog without giving them a whole separate post or page. A good principle of thumb is the fact that a single post should end at least 300 words.
WordPress SEO with Yoast SEO Plugin
Yoast SEO is a fantastic free plugin that I actually always install on any WordPress site.

Too many functionality to cover it all here, but here are some highlights of what it does:
- Rewrites Title Tags – So post titles come at the starting and enables you to write custom title tags for any archives or specific posts.
- Meta Description Editor – To easily add relevant meta descriptions site-wide and customize for individual posts and pages.
- Avoids Duplicate Content – By establishing the ‘rel=canonical’ tag for you (if you don’t understand what this means, it’s a way of telling search engines what the original page was since WordPress is capable of delivering the same post at multiple different URLs).
- 404 Monitor – To ensure your website remains error free.
- Slug-Optimizer – Likely the most curious sounding feature, the slug-optimizer removes worthless short words from your pretty permalink URLs thereby making them shorter and much more relevant.
- Social – Allows search engines to know which social profiles associated with the site.
- XML Sitemap – Handles XML sitemap generation for you.
- Advanced SEO – Takes care of advanced issues like breadcrumbs, custom permalinks, and RSS feed configurations to identify your website as the original source of content.
Generally, it handles every factor of SEO you will ever want, but you can disable any parts of it you don’t need. Some are quite advanced and certainly not topics I can cover in this guide, but as you find out more about SEO, you can be certain you won’t need to change plugins to get that extra functionality.
back to menu ↑
8. Securing WordPress
WordPress security is a topic of huge importance for each website owner. Every week, Google blacklists around 20,000 websites for malware plus around 50,000 for phishing.
Sadly, most beginners don’t know about vulnerabilities that are likely to occur when starting a new website. So if you are serious regarding your brand-new website, then you need to pay attention to this WordPress security best practices.
WordPress Security Complete Guide
Why WordPress Security is Important?
A hacked WordPress site may cause serious damage to your business revenue and reputation. Hackers can steal user information, passwords, install malicious software, and distribute malware to your users.
Most severe, you may find yourself paying ransomware to hackers in order to regain access to your website.
In March 2016, Google reported that more than 50 million website users have already been warned about a website they’re visiting may consist of malware or steal information.
Especially if your website is a business, then you have to pay extra attention to your WordPress security.
Similar to how it’s the business owners responsibility to guard their physical store building, as an online business owner it really is your obligation to protect your business website.
General WordPress Security Tips
Being a website owner, there’s a lot that can be done to improve your WordPress security (even if you’re not tech savvy). But it will be impossible to cover almost all in this guide, so I will give you some of the best practices that I think are most important and easiest.
Keeping WordPress Updated
WordPress is an open source platform which is frequently maintained and updated. Simply by default, WordPress automatically installs minor updates. For main releases, you need to manually initiate the update.
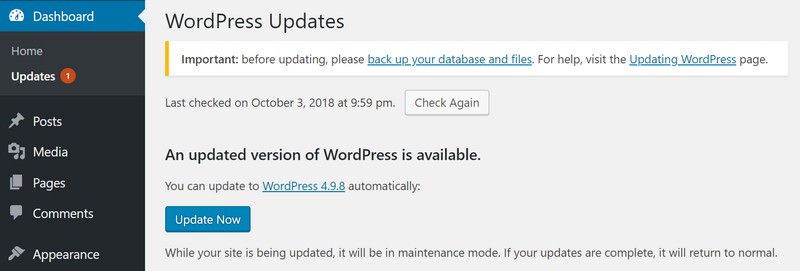
WordPress also comes with countless numbers of themes and plugins that you can install on your website. These themes and plugins are taken care of by third party developers which regularly release updates as well.
These WordPress updates are important for the security and stability of your WordPress site. You need to ensure that your WordPress core, themes, and plugins are up to date.
Strong Passwords and User Permissions
The most typical WordPress hacking attempts to use stolen passwords. You can make that difficult simply by using stronger passwords that are unique for your website. Not just for WordPress admin area, but also for FTP account, database, WordPress hosting account, and your professional email address.
The main reason exactly why beginners don’t like using strong passwords happens because they’re hard to remember.
Another way to reduce the risk is to not give anyone access to your WordPress admin account until you absolutely have to. When you have a big team or guest authors after that make sure that you understand user roles plus capabilities in WordPress just before you add new user and authors to your WordPress site.
The Role of WordPress Hosting
Your WordPress hosting service performs the most important part in the security of your WordPress site. A great shared hosting provider such as Siteground take the additional measures to protect their servers against common threats.
Nevertheless, on shared hosting, you share the server resources along with many other customers. This particular opens the risk of cross-site contamination where a hacker can use the neighboring site to attack your website.
Using a managed WordPress hosting provides a more secure platform for your website. Managed WordPress hosting company like SiteGround offer automatic backups, automatic WordPress updates, plus more advanced security settings to protect your website.
Optimize WordPress Security with Plugins
I can say that hardening WordPress security can be a terrifying thought for newbies. Especially if you’re not techy. Luckily, there are several great plugins available that are ready to help you to do it.
Install a WordPress Backup Solution
Backups are your first protection against any WordPress attack. Remember, nothing is 100% secure. If the government websites can be hacked, so do yours.
Backups allow you to immediately restore your WordPress site in the event something bad was to occur.
Presently there are many free and paid WordPress backup plugins which you can use. The most essential thing you need in order to know when it comes to backups is that you must regularly save full-site backups to a remote location (not your hosting account).
I suggest storing it on a cloud service like Amazon, Dropbox, or private clouds like Stash.
Based on how often you update your website, the ideal setting could be either once a day or real-time backups.
Luckily this could be easily carried out by using plugins like VaultPress or BackupBuddy. These plugins are both reliable and most importantly simple to use (no coding needed).

Install Sucuri Security Plugin
Right after backups, the next thing you need to perform is set up an auditing and monitoring system that will keep track of everything that happens on your website.
Luckily, this can end up being all taken care by the best free WordPress security plugin, Sucuri Security which is a super-sophisticated security suite designed to complement your existing security posture.
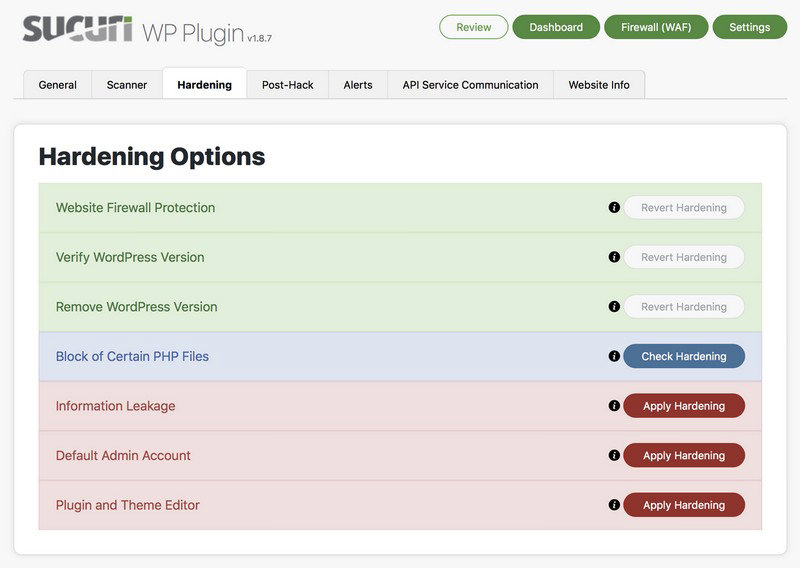
Sucuri provides you with a set of security features for your WordPress site, each created to have a positive effect on your security posture:
- Security Activity Auditing
- File Integrity Monitoring
- Remote Malware Scanning
- Blacklist Monitoring
- Effective Security Hardening
- Post-Hack Security Actions
- Security Notifications
- Website Firewall (premium)
back to menu ↑
9. Optimizing WordPress Speed
Many search engines such as Google, Bing, and Yahoo love the website load time when contemplating for indexing and page ranking that means web search ranking also depends upon a website speed. As well as, all internet users, like fast loading website and spend more time surfing.
Unfortunately, most beginners don’t know where to start speed optimization on their new website. Therefore I decided to make this guide, even though it doesn’t cover all, but at least I can give you several best practices for speed optimization on your WordPress site that I think are the most important and easiest.
WordPress Speed Complete Guide
External Image Hosting with CDN
One major factor speed on your page is the time it takes to load images from your server. The page itself (the textual HTML content) is fairly fast, however, the images will always be sluggish to load.
If you have a website which makes heavy use of images on the front page. For example, you will possibly find the user experiences sever ‘sequential loading’ where they’re currently waiting for the image after image to load, line by line in extreme instances. This is how the idea of external image hosting or CDNs comes in.
CDNs are high-speed data centers situated around the world that mirror your image (and JavaScript) content, serving them up to visitors as required from locations as near to the user as possible. The result is the instantaneous loading of images, and this technology is completely key to almost every high-traffic site on the internet.
Despite the fact that they are an additional cost, it’s actually proceeding to cost you a lot less than if you used the same amount of additional bandwidth on your web hosting plan. The expenses are incredibly low – super fast KeyCDN.com provides a 1TB of transfer for $40 (expires after 12 months).
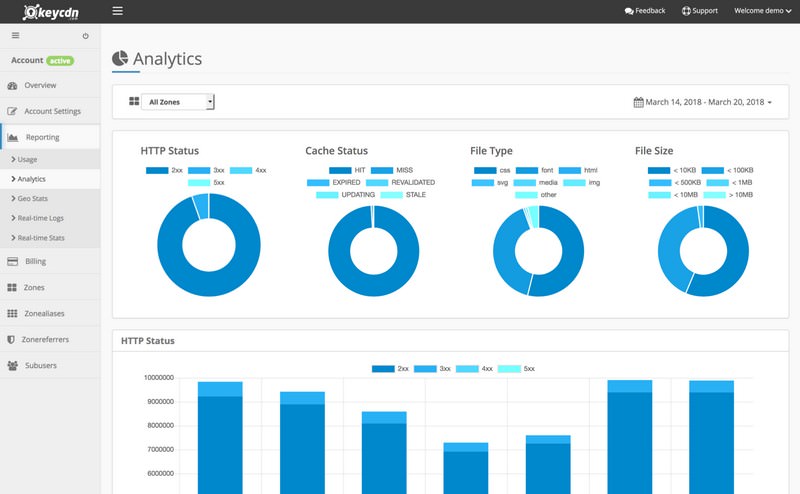
To utilize this service you’ll need the W3 Total Cache plugin described later in this chapter.
Reduce Unneeded Requests with Cloudflare
Surprisingly, up to one third of requests made to a website can be either malicious robots, automated scans or otherwise unfriendly. By simply cutting these out before reaching your website, you can make sure you only serve content to real users. This can be achieved for free with Cloudflare.com.

As soon as you switch your name servers to Cloudflare’s, it essentially acts as a proxy and filter to keep away the bad guys and frequently results in considerable speed increases on your page time. One minor point is that your website will see all visitors as approaching from Cloudflare, so you’ll need to install their WordPress plugin in order to properly report the IP addresses etc.
Install W3 Total Cache Plugin
W3 Total Cache is the big-daddy of caching plugins and has so much functionality you will probably find it a little overwhelming. I’ll split down each feature it provides, but please remember that your mileage will vary. In instance some users report very little improvement in using shared hosting.
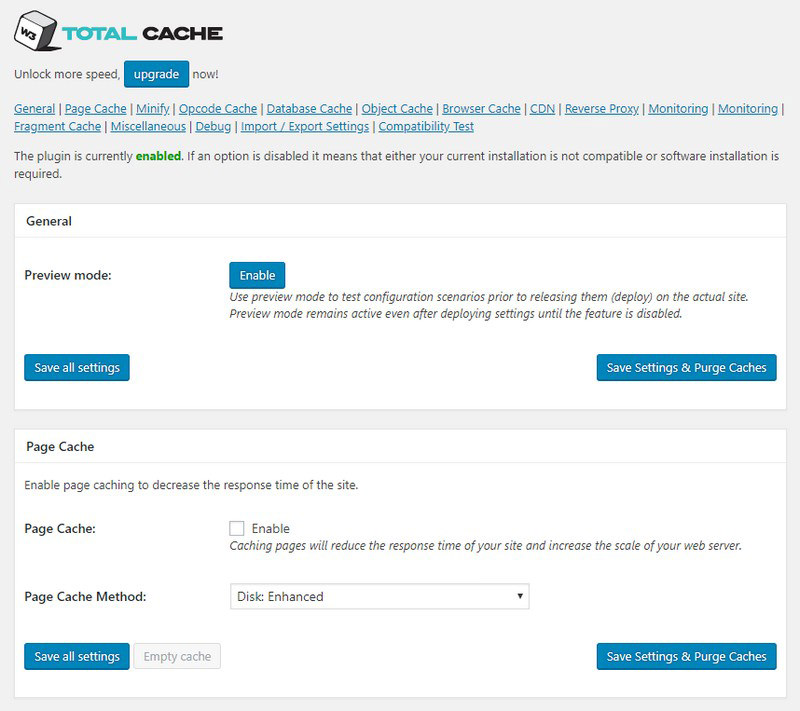
- Page Cache – This is the core features, in that it creates a static copy of your website’s posts and pages and can serve them rapidly to users.
- CDN – This allows you to host not only your media files (pictures etc) but also any theme files, graphics, and Javascript.
- Object and Database Cache – Particularly very useful for slow database servers, this prevents the same query being created over and over.
- Minification – The art of making things tiny! This means clearing any unneeded spaces, line breaks and comments from HTML and Javascript.
- Browser Cache and Control Headers – Even though a lot of the internet is cacheable, many sites simply aren’t set up by default to permit this. This feature ensures your site’s pages are sending the right headers to say to the user’s browser “yes, you can cache this page for X days”.
Or even you need a more robust plugin, use WP Rocket which is among the best premium plugins for WordPress speed optimization.
Database Optimization
Databases can often get untidy. With constantly writing plus updating entries, they build up temporary bits, referred to as overhead. This can increase your database size significantly, and may often lead to critically sluggish performance or even a complete shutdown.
So keeping the database tables optimized is highly recommended. WP-DBManager plugin can handle this by providing a good graphical interface for database backups.

back to menu ↑
10. Making Money from Your Website
Since you’ve created your website and customized it in order to your liking, you might be thinking how can I actually make money from my website?
There are a lot of different ways to successfully monetize your website. On the other hand, there is absolutely no such thing as a get rich quick scheme.
Don’t be fooled simply by the pictures of expensive cars and mansions because all those are most likely fake.
So long as you’re willing to put in the effort plus hard work, you’ll reap the particular reward. Remember, there are no shortcuts.
Here are several finest ways of making money through your website.
Google AdSense
Numerous bloggers make money simply by showing ads on their own website. If you create a website with monetization in mind, then Google AdSense is the best way to do this.

It is the bigges advertising platform for bloggers and publishers. Acting as a middleman between you and the advertiser, Google permits advertisers to bid regarding keywords matching your content. This enables you to obtain the best rates possible for the ads.
Affiliate Marketing
Affiliate marketing is the second most commonly used monetization method among bloggers. Generally, you recommend products and services to your visitors and whenever they make a purchase you will get a referral commission.

Typically the key in affiliate marketing is to recommend top quality products and services of which you already use and trust. There are lots of affiliate marketing plugins and tools for WordPress that will help you make more income when promoting affiliate products.
Online Store
Numerous bloggers make money simply by selling things directly through their website. This could be physical products, digital downloads like ebook, graphic, music, and many more. Some bloggers even offer consulting services.
I advise using WooCommerce since it is the best eCommerce plugin for WordPress. It also the most widely used eCommerce platforms in the world.

That’s not really all you can do with your WordPress site. You possibly can make your websites specifically for reviews, fashion blogging, food blogging, and even more. Each one of these website types gives you more unique possibilities to make money.
back to menu ↑
Your WordPress Site is Ready!
As you can see, starting a website with WordPress platform isn’t as simple as running a quick installation package and then writing. There are a lot of things to consider. All from themes, plugins, backups, spam and more.
Hopefully, this guide has provided you with all of the particular tools you need in order to get started with launching your own WordPress site.
I actually would like to hear your opinion. Was this guide helpful? Did it help you to create your WordPress site? Is there anything you didn’t understand or something which needs to be changed? Please don’t hesitate to drop me a line in the comments and I’ll be glad to help you out.

- Readers Rating
- Rated 5 stars
5 / 5 ( Reviewers) - Spectacular
- Your Rating